

Imagine cooking a steak that’s perfectly medium-rare from the very edge all the way to the center. No gray band, no guesswork, just flawless results every single time. That’s the magic of sous vide.
The name itself, "under vacuum" in French, points to the technique, but the real secret is its incredible precision. It’s a method that allows chefs—and now home cooks—to achieve a level of consistency that was once impossible with traditional cooking.
Why Top Chefs Rely on Sous Vide
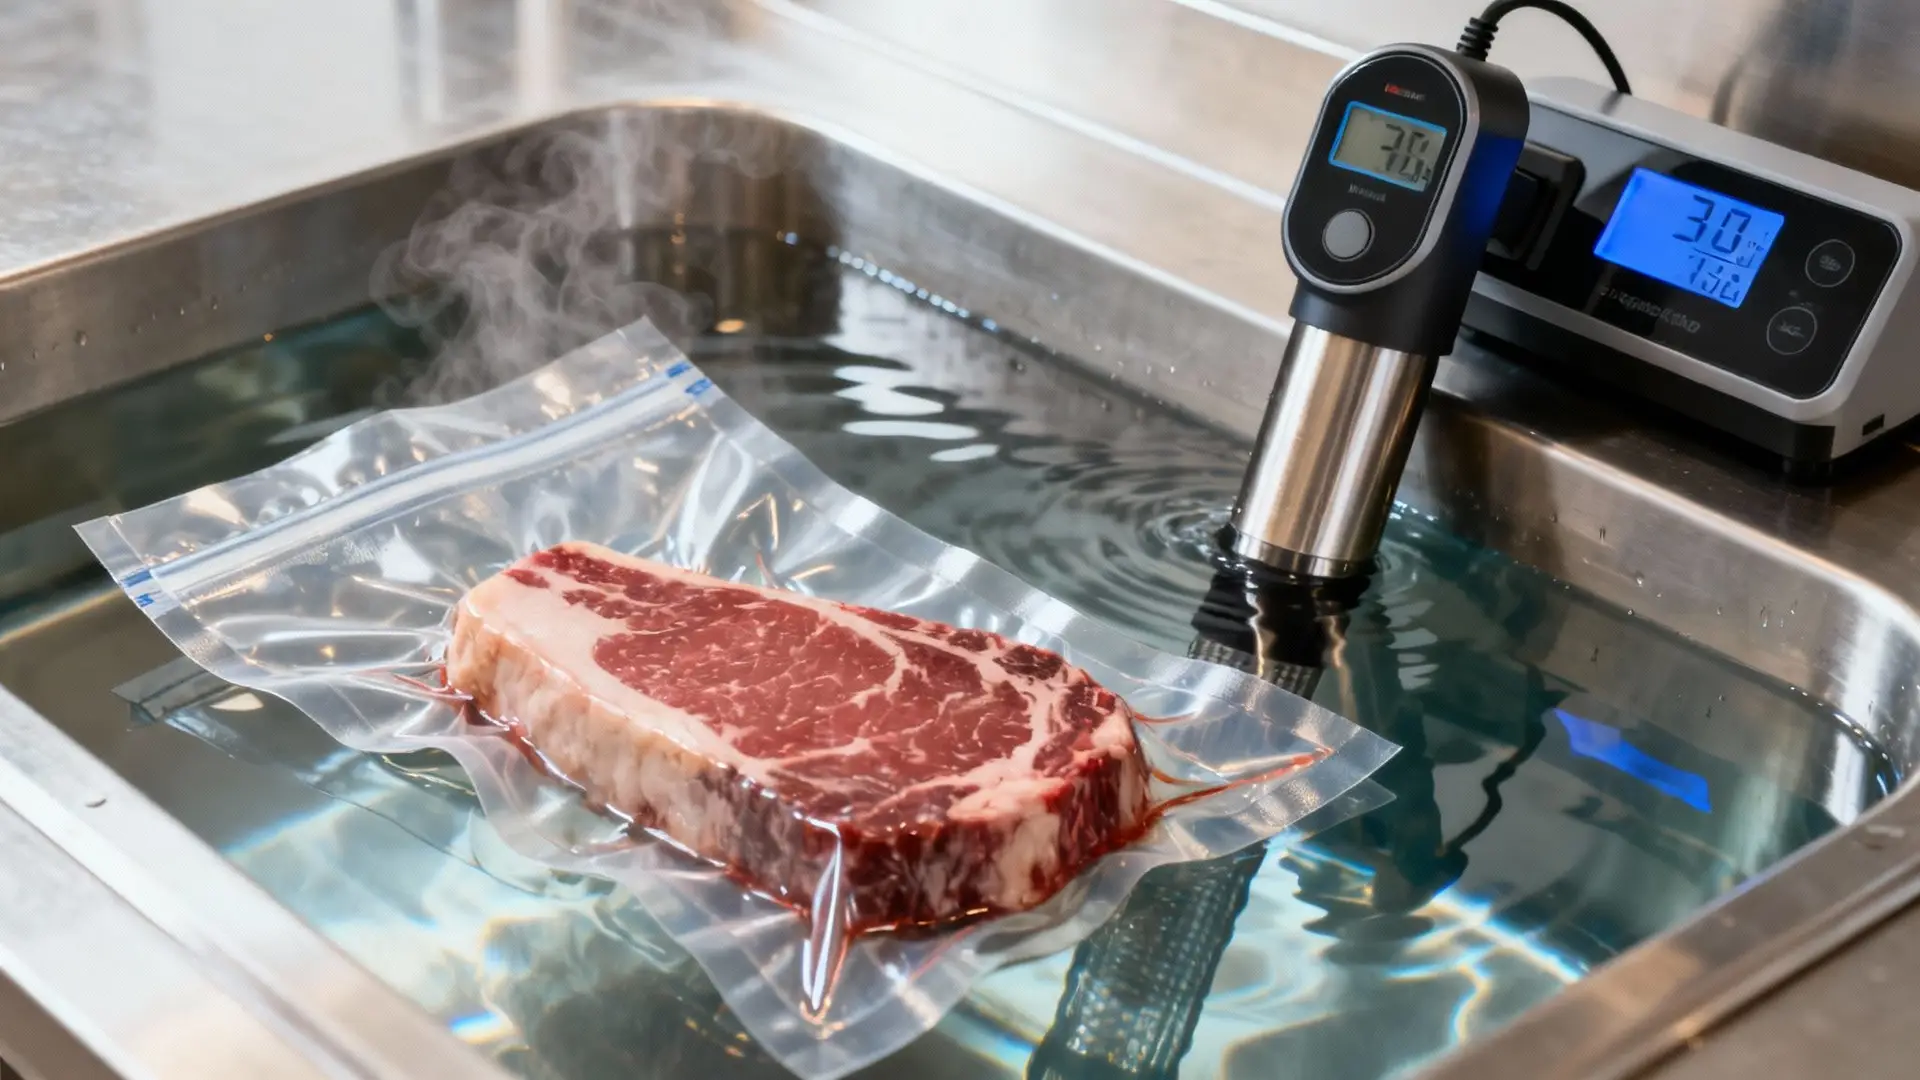
So, what exactly is sous vide cooking? Think of it like giving your food a perfectly controlled, warm bath. Instead of blasting food with the intense, fluctuating heat of an oven or a hot pan, you seal it in a bag and submerge it in water held at a very precise temperature.
This gentle process slowly brings the food up to that exact temperature—and keeps it there. It can’t go any higher. This isn't just another kitchen trend; it's a fundamental shift from cooking by feel to cooking with scientific accuracy.
The age-old challenge in cooking is managing heat. An oven set to 350°F is a chaotic environment for a delicate chicken breast, making that window for perfect doneness incredibly small. Sous vide completely removes that stress. If you set the water to 150°F, the chicken can never overcook. It simply reaches its target temperature and holds, juicy and perfect, until you're ready.
The Core Benefits of This Method
The appeal of sous vide really boils down to three game-changing advantages that professional kitchens have been quietly using for years. The good news? These benefits are now easy to achieve at home. If you're curious about how pros think, you can explore some of our top cooking tips for chefs to see how precision fits into a broader culinary strategy.
Here’s why it’s so powerful:
- Unmatched Consistency: Your steak will hit a perfect medium-rare from crust to core. Chicken comes out impossibly juicy every single time. It takes the guesswork out of the equation, eliminating the variables that lead to overcooked or undercooked food.
- Enhanced Flavor and Juiciness: Since the food is sealed in a bag, there's nowhere for the natural flavors and juices to go. Everything is locked in, concentrating the taste and leading to incredibly succulent results. You're tasting the food as it was meant to be.
- Incredible Tenderness: This is where sous vide really shines. Tougher, more affordable cuts of meat like flank steak or pork shoulder are loaded with connective tissue. The long, slow, and gentle cooking process breaks all that down, transforming them into melt-in-your-mouth tender meals that taste like they cost a fortune.
The Science Behind Perfect Cooking Results
To really get what makes sous vide so incredible, you have to look past the fancy gear and dive into the simple, powerful science that makes it all work. At its heart, sous vide is all about mastering heat.
Think about cooking a steak in a hot pan. The pan is scorching hot, so it blasts the outside of the steak with intense heat to cook it from the outside in. This creates what chefs call a "temperature gradient"—the outside is well-done (or even burnt) while you hope the inside is a perfect medium-rare. It’s a race against time.
Sous vide throws that whole problem out the window. By placing your food in a water bath held at the exact temperature you want it to be, the heat transfers gently and evenly. Your steak simply can't overcook. It’s impossible for it to get any hotter than the water surrounding it.
This level of control feels cutting-edge, but low-temperature cooking has been around for ages. The technique really hit its stride in 1974, though, thanks to French chef Georges Pralus. He was tired of his delicate foie gras shrinking to half its size when cooked traditionally. Using this low-and-slow water bath method, he found it kept about 95% of its original weight. It was a game-changer. You can get the full story from this fascinating history of sous vide.
How Temperature Shapes Texture and Flavor
The real magic of sous vide is happening on a microscopic level. Cooking meat is basically about two things: changing the structure of proteins and breaking down tough connective tissue.
When you throw a steak on a hot grill, those reactions happen fast and furious. The intense heat makes the muscle fibers clench up and squeeze out moisture. Miss that perfect moment, and you’re left with a tough, dry piece of meat.
Sous vide is far more patient. By holding food at a precise temperature for a long time, you give the tough stuff—like collagen—plenty of time to melt into rich, silky gelatin. All without ever overcooking the tender muscle fibers. This is exactly how a tough cut like brisket becomes fall-apart tender after a 24-hour bath at 155°F.
The key takeaway is simple: In sous vide cooking, temperature dictates the final doneness, while time determines the final texture. This separation of variables is what gives you unprecedented control in the kitchen.
This scientific mindset is a pillar of modern cooking. By understanding how to manipulate ingredients at a molecular level, chefs can craft entirely new textures and flavors. We explore this even further in our guide on what is molecular gastronomy.
The Critical Role of Heat Transfer
The secret ingredient here is water. To understand why, you just have to compare how heat moves through different environments.
Air is actually a terrible conductor of heat. It's why your oven has to be set to a blazing 375°F just to get a chicken breast to an internal temperature of 165°F. Water, on the other hand, is incredibly efficient.
Let’s break it down:
- Traditional Oven (Convection): Hot, dry air swirls around your food, hitting it unevenly and cooking from the outside in.
- Sous Vide Water Bath (Conduction): Water makes direct contact with the sealed bag, transferring heat efficiently and uniformly to every single part of the food inside.
This direct conduction is the reason sous vide is so unbelievably consistent. It guarantees that every inch of your steak, chicken, or fish reaches the perfect temperature at the exact same time. You're no longer just cooking; you're engineering the perfect result, creating that edge-to-edge perfection that was once reserved for the world’s best restaurant kitchens.
Getting Started With Sous Vide Equipment
Jumping into sous vide might feel a little intimidating, but the gear you need is actually pretty simple. You don’t need a kitchen packed with fancy gadgets to get started. At its heart, the whole setup really just boils down to a few key pieces that work together to create that perfectly controlled cooking environment.
The beauty of this method is how accessible it is. Sure, professional kitchens might have massive, dedicated sous vide water ovens, but you can pull off the exact same pro-level results right at home with a surprisingly small investment. Let's walk through the essential tools you'll want to have on hand.
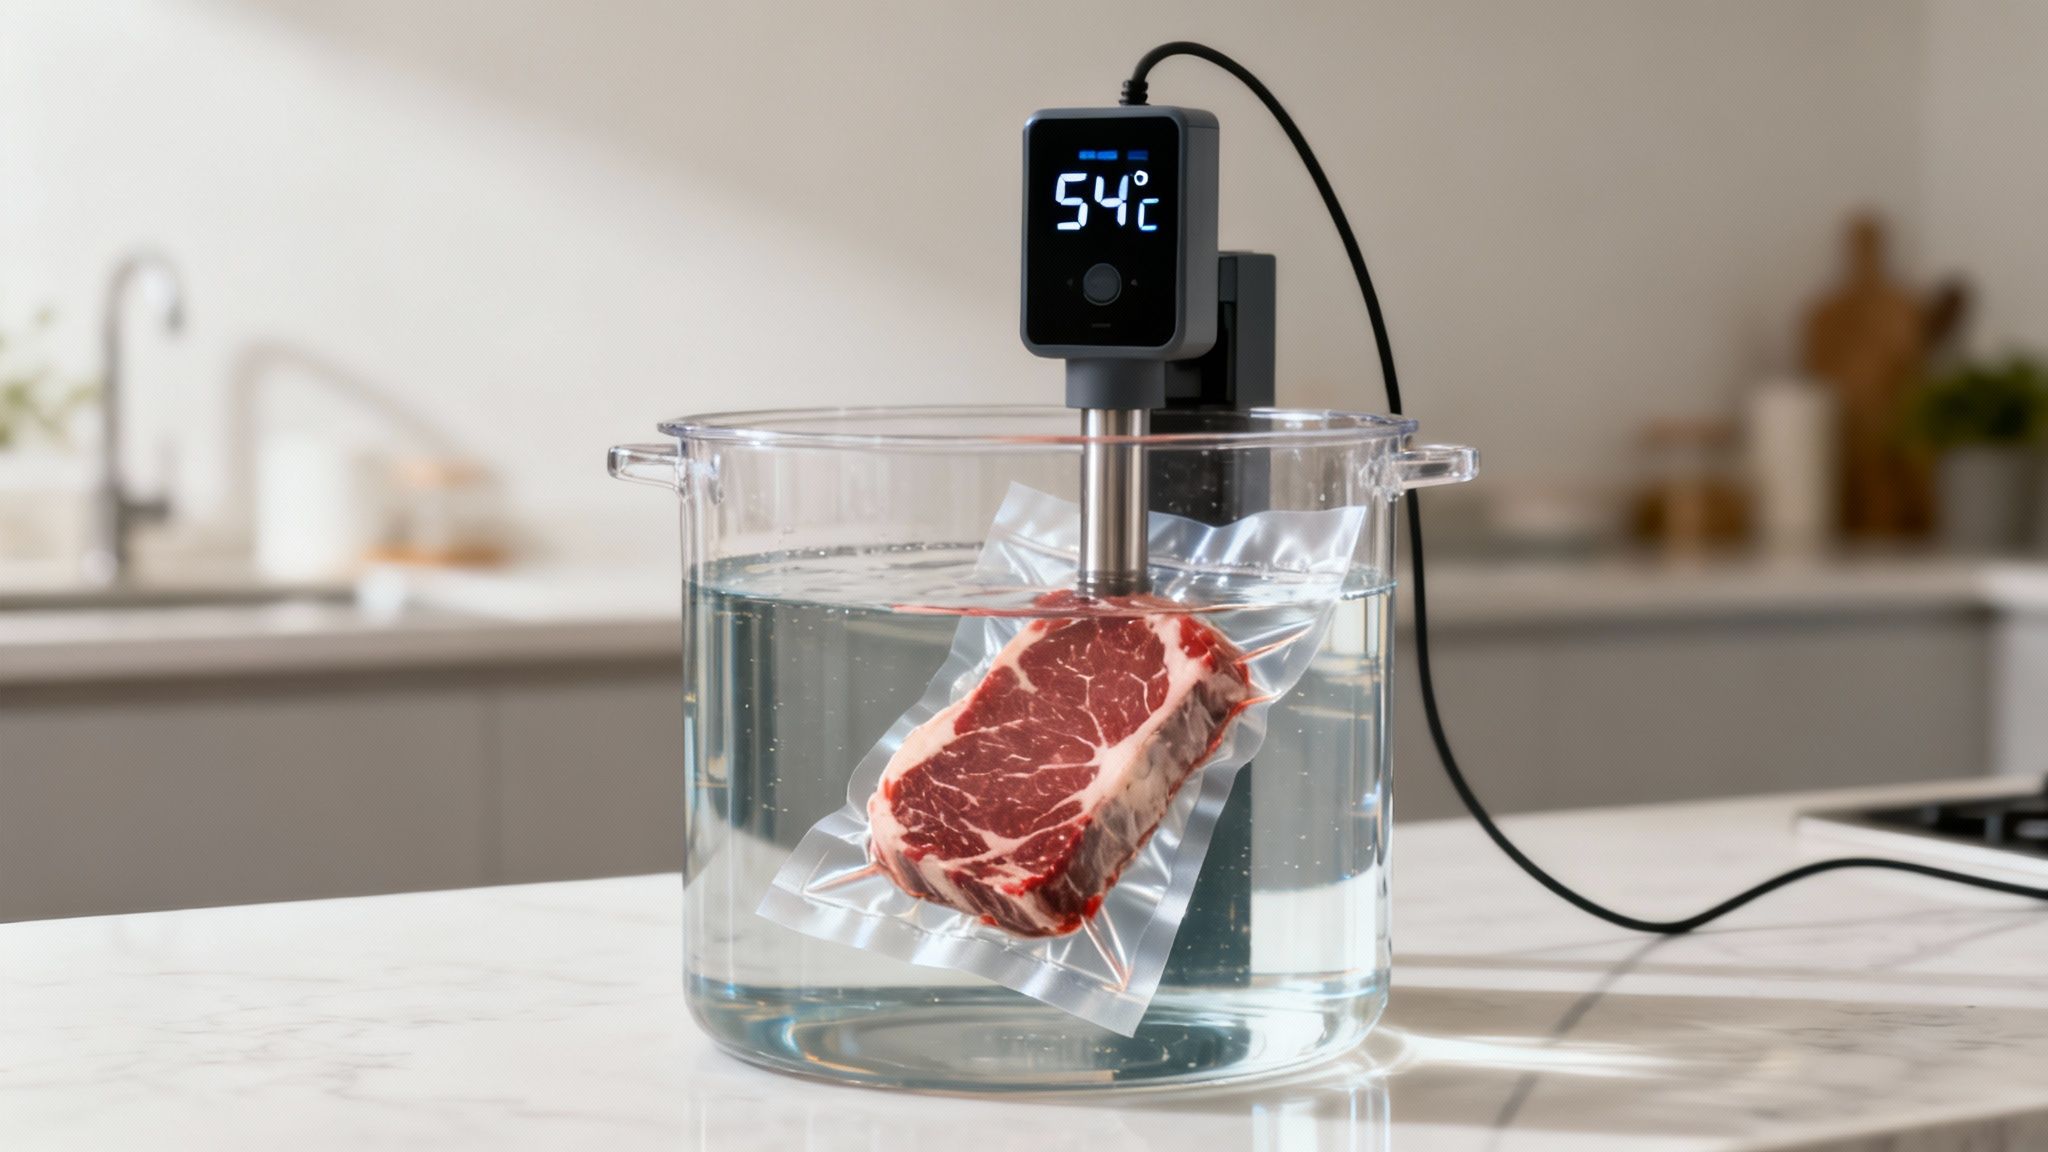
The Brains of the Operation: The Immersion Circulator
First up, the most important piece of the puzzle is the immersion circulator. Think of this thing as the smart engine driving your entire sous vide setup. It’s a stick-like device that you just clip onto the side of any pot or container you’ve filled with water.
It does two critical jobs at once:
- Heating: It has a heating element inside that brings the water to your exact target temperature—often with pinpoint accuracy, down to a single degree.
- Circulating: A small motor keeps the water moving constantly, which gets rid of any hot or cold spots. This ensures the temperature is perfectly even all the way through the bath.
That constant movement is the secret sauce that guarantees your food cooks evenly from every single angle. It’s this level of precision that separates true sous vide from just poaching something in a pot of warm water. The circulator is what makes the whole process practically foolproof.
The Vessel: Choosing Your Water Bath Container
Don’t rush out and buy a special container just yet. Any large stockpot you already have in your kitchen will work just fine for your first few cooks. The only real requirement is that it needs to be big enough to hold the circulator and let you fully submerge whatever you’re cooking.
Once you get into the swing of things, you might want to upgrade to a dedicated container. A lot of home cooks swear by large, clear polycarbonate containers. They’re tough, they hold heat well, and you get a nice view of your food as it cooks. When you're picking out gear, always keep safety in mind and look for things like BPA-free containers.
The ideal container should be deep enough for water to flow freely all around your food bags and wide enough to avoid any crowding. Good circulation is everything when it comes to even cooking.
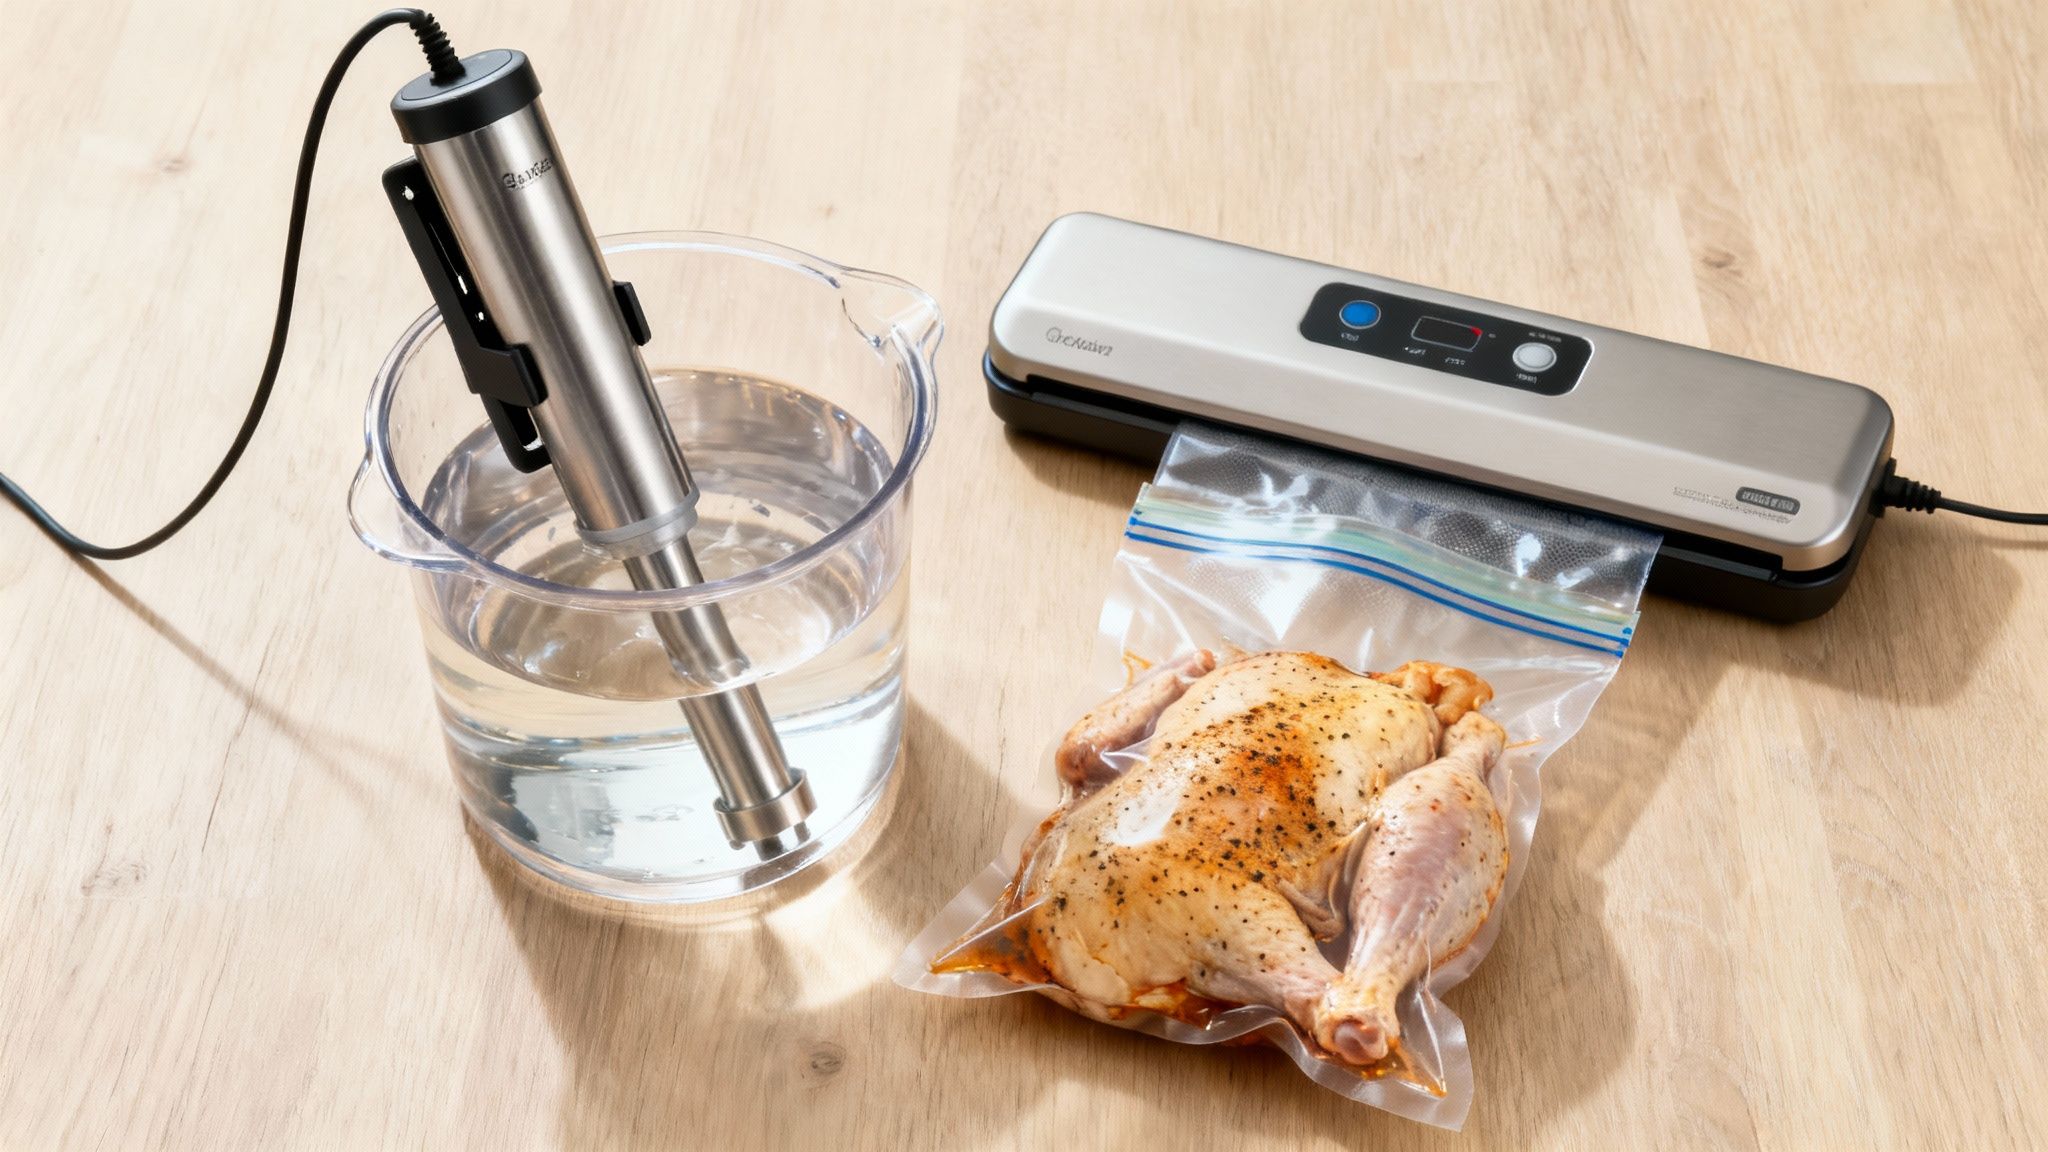
Sealing the Deal: Bags and Vacuum Sealers
The last piece you need is a way to seal your food. The main goal here is to get as much air out of the bag as possible. This ensures the food makes direct contact with the heated water, allowing for super-efficient heat transfer. You’ve got two main options.
A vacuum sealer is the most effective tool for the job. It sucks out all the air and creates a super tight seal, which is especially great for longer cooks (think 24+ hours) or for sealing up awkwardly shaped items.
But a vacuum sealer is definitely not a must-have when you're starting. For most day-to-day cooking, you can use the incredibly simple and effective water displacement method. This technique uses the pressure of the water itself to push the air out of a regular zip-top freezer bag, giving you a nearly perfect seal without any special equipment. It's a fantastic, budget-friendly way to get going.
How To Cook Your First Perfect Meal

Alright, we've covered the "what" and the "how" of sous vide. Now comes the best part: getting your hands dirty and making something delicious. We're going to walk through cooking a perfect sous vide steak—it’s a classic for a reason and really shows off what this technique can do.
Don't be intimidated. The process is incredibly straightforward, designed to give you a huge win right out of the gate. Let’s fire it up.
Step 1: Prepare Your Protein
First things first, prep your steak. Take it out of the fridge and pat it completely dry with paper towels. I mean completely dry. This is non-negotiable if you want a killer sear later on, so don't cut corners here.
Next, season it well. Be generous with the salt and freshly ground black pepper on every surface. Want to add more flavor? Go for it. A few sprigs of fresh rosemary, thyme, or some smashed garlic cloves will infuse right into the meat while it cooks.
Step 2: Seal The Bag
Now, get that seasoned steak into a food-safe bag. If you’ve got a vacuum sealer, you know the drill—seal it up tight according to the manufacturer’s instructions. This gets all the air out and gives you the best contact between the meat and the water.
No vacuum sealer? No problem. The water displacement method is your best friend. Just place the steak in a zip-top freezer bag and seal it almost completely, leaving just a small opening. As you slowly lower the bag into the water, you'll see the water pressure push all the air out. Once it's all out, zip it up the rest of the way.
Step 3: Set The Cook Time And Temperature
Time to get the bath ready. Clamp your immersion circulator onto your container and fill it with water, making sure the water level falls between the minimum and maximum lines on the device.
The temperature you set is what determines your final doneness. It’s that simple. Here's a quick cheat sheet for steak:
- Rare: 129°F (54°C)
- Medium-Rare: 135°F (57°C)
- Medium: 140°F (60°C)
- Medium-Well: 145°F (63°C)
For your first time, I highly recommend aiming for a perfect medium-rare at 135°F. Set your circulator and wait for it to beep. Once the water is up to temp, gently place your sealed bag into the bath. Let it hang out in there for at least an hour, but you can go as long as four hours. That's the magic of sous vide—it literally can't overcook.
Step 4: Finish With A Perfect Sear
Your steak is perfectly cooked inside, but it's not finished yet. We need to build that gorgeous, crusty exterior. This happens through the Maillard reaction, which is just the fancy term for what happens when high heat creates incredible flavor and color.
Pull the bag from the water and take out the steak. And what’s the next step? You guessed it: pat it dry again. A bone-dry surface is absolutely essential for a deep, even crust.
Get a cast-iron skillet ripping hot over high heat. Add a splash of a high-smoke-point oil, like canola or avocado. When the oil just starts to shimmer, you're ready.
Lay the steak down and sear it for just 30-60 seconds per side. All you're doing is creating a crust, not cooking it further. For extra flavor, throw a knob of butter, more garlic, and herbs into the pan for the last 15 seconds.
Move the steak to a cutting board and let it rest for a few minutes. Slice it against the grain, and prepare to be amazed by the edge-to-edge perfection you just created.
As you get comfortable with sous vide, you'll find it pairs beautifully with other essential cooking techniques. Building a well-rounded skillset will make you a more confident and creative cook in the kitchen.
A Simple Time And Temperature Guide
Getting the hang of sous vide isn't about memorizing complicated recipes. It's really just about two things: time and temperature. Once you understand how these two variables work together, you'll be able to cook almost anything to perfection, every single time. This guide is your starting point—no more guesswork, just the confidence to get cooking.
Here’s the core concept to remember: temperature sets the final doneness, while time creates the texture. That simple separation is what makes sous vide so powerful. A steak cooked at 135°F will always be a perfect medium-rare, whether it’s in the water bath for one hour or four. The extra time just breaks down more connective tissue, making it even more tender.
This gives you an incredibly forgiving cooking window. A few minutes too long in a hot oven can ruin a great piece of meat, but with sous vide, you can hold food at its ideal temperature for hours without ever overcooking it.
Perfect Temperatures for Common Proteins
When you set the temperature on your circulator, you're literally dialing in the exact level of doneness you want, from one edge to the other. For proteins like beef, pork, and lamb, this gives you an almost unbelievable amount of control.
Take a thick-cut ribeye, for instance. You can achieve your exact preference with total precision:
- Rare: 129°F (54°C) – A deep red, warm, and incredibly juicy center.
- Medium-Rare: 135°F (57°C) – The classic sous vide result. Perfectly pink and exceptionally tender.
- Medium: 140°F (60°C) – A lighter pink center with a slightly firmer, but still juicy, texture.
- Medium-Well: 145°F (63°C) – Just a hint of pink remains, with very little moisture loss.
Poultry is a different story, mainly because of food safety. We've all been taught to cook chicken to 165°F, which usually results in dry, stringy meat. Sous vide offers a better way by using time to pasteurize the meat at a lower temperature.
A chicken breast cooked at 150°F (65°C) for at least one hour is fully cooked, completely safe, and shockingly juicy. It's a texture you simply can't get from a traditional oven.
This same principle is a game-changer for holiday meals. If you want to guarantee a moist and flavorful bird for a big feast, it's worth learning about the correct temperature for turkey.
How Time Transforms Texture
While temperature sets the "how cooked," time is your lever for "how tender." This is where sous vide really shines, especially with tough, collagen-rich cuts like beef chuck, pork shoulder, or brisket—the kinds of cuts usually reserved for long, slow braises.
Sous vide achieves the same melt-in-your-mouth tenderness, but with even better results because the meat never dries out. A long, slow cook in the water bath gently dissolves all that tough connective tissue into rich, savory gelatin.
- A beef chuck roast cooked at 135°F (57°C) for 24 to 48 hours goes from a tough cut to something as succulent and tender as a prime rib.
- Pork ribs cooked at 165°F (74°C) for 12 hours will have meat that pulls cleanly from the bone but is still incredibly moist.
This relationship isn't just for meat. Vegetables benefit, too. Carrots cooked at 185°F (85°C) for an hour become perfectly tender-crisp, holding onto their bright color and sweet flavor in a way that boiling or steaming just can't match.
Sous Vide Cooking Temperatures and Times
To help you dive in, we've put together a quick-reference table with some of our go-to starting points for common foods. Think of these as reliable recommendations, not strict rules. The best part of sous vide cooking is experimenting to find what you like best.
| Food Item | Desired Doneness | Temperature (°F / °C) | Minimum Cooking Time |
|---|---|---|---|
| Beef Steak (1" thick) | Medium-Rare | 135°F / 57°C | 1 hour |
| Pork Chop (1" thick) | Medium | 140°F / 60°C | 1 hour |
| Chicken Breast | Juicy & Tender | 150°F / 65°C | 1.5 hours |
| Salmon Fillet | Flaky & Moist | 130°F / 54°C | 45 minutes |
| Root Vegetables | Tender-Crisp | 185°F / 85°C | 1 hour |
| Tough Cuts (e.g., Chuck Roast) | Fork-Tender | 135°F / 57°C | 24-48 hours |
Use this chart as your launchpad into the precise and forgiving world of sous vide. Start with these times and temps, see what you think, and before you know it, you’ll be dialing in the perfect combinations to create your own signature dishes.
Common Mistakes To Avoid
Even the most seasoned chefs make mistakes. It happens. The real key is learning how to fix them—and better yet, how to avoid them in the first place. Sous vide is an incredibly forgiving way to cook, but a few common slip-ups can stand between you and a truly perfect meal.
Once you know what to look for, you can sidestep these pitfalls entirely and lock in a flawless result, every single time.
The Dreaded Floating Bag
This is probably the number one issue newcomers face. You walk away, and when you come back, your bag is bobbing at the surface. If it isn't fully submerged, the food won't cook evenly, which completely defeats the purpose of sous vide. This almost always happens because air gets trapped inside, creating little pockets of buoyancy.
To prevent this, always take an extra moment to double-check your seal. If you’re using the water displacement method, be patient and push out as much air as humanly possible before zipping it shut. For naturally lightweight foods like fish fillets or asparagus, you might need to add a little weight. You can buy special sous vide weights, or just get creative and place a heavy butter knife or a clean spoon inside the bag (away from the food, of course) before you seal it.
Forgetting the All-Important Sear
This is a big one. After hours in the water bath, your protein is cooked perfectly on the inside, but it’s going to look pale, grey, and frankly, a little sad. Skipping the final sear is a critical mistake.
That beautiful, brown crust isn’t just for looks—it’s where a massive amount of flavor comes from. It’s the result of the Maillard reaction, a chemical process that creates hundreds of new flavor compounds. Without it, you’re missing out on all the rich, savory notes that make a steak taste like a great steak. Always, always finish your sous vide proteins with a quick, high-heat sear in a screaming-hot pan.
Here's the golden rule: The surface of your food must be completely dry before it hits that hot pan. Moisture is the enemy of a good crust. Pat your food down thoroughly with paper towels after taking it out of the bag. This is the secret to a perfect finish.
Misunderstanding Time vs. Texture
While it's nearly impossible to "overcook" food in the traditional sense with sous vide, you can absolutely leave it in the water for too long. Here’s the distinction: temperature controls the final doneness, but time dictates the final texture.
A steak left in a 135°F water bath for eight hours will still be a perfect medium-rare. However, the muscle fibers will have broken down so much that the texture can become mushy and unpleasant. Stick to the recommended time ranges for the texture you're after.
Understanding the right temperature is also fundamental for both deliciousness and food safety. This chart highlights some ideal targets for common proteins.
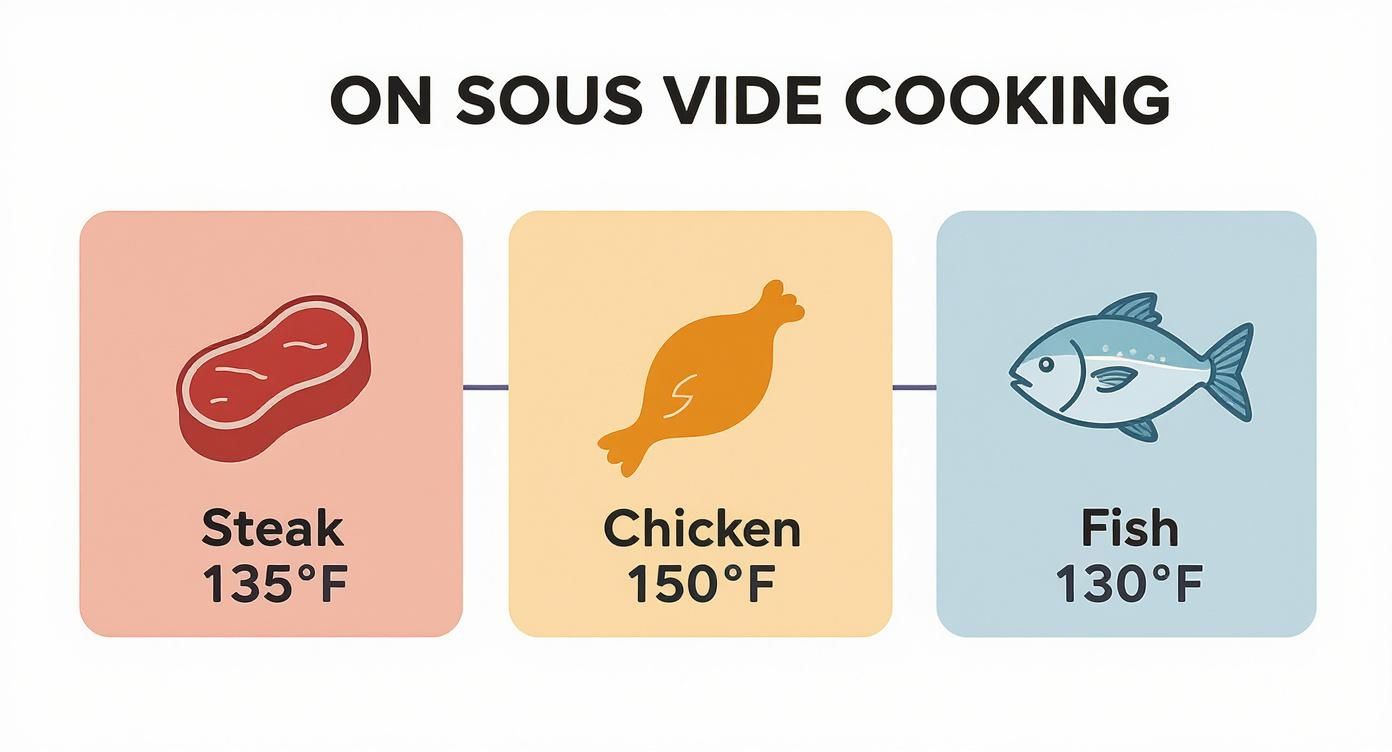
As the infographic shows, different foods need different temperatures to hit that sweet spot of perfect texture and safe doneness.
Finally, a quick word on safety—it’s non-negotiable. Cooking at low temperatures for extended periods requires you to be mindful.
- Respect the "Danger Zone": Bacteria love to multiply between 40°F and 140°F. You should never cook below 130°F for more than a couple of hours unless you're following a specific, tested recipe designed for pasteurization.
- Chill It Fast: If you aren't serving the food right away, you have to cool it down quickly. Plunge the sealed bag into an ice bath to bring the temperature down rapidly before moving it to the fridge or freezer.
By keeping these simple tips in mind, you’ll move beyond just following instructions and start truly mastering the art of what is sous vide cooking.
Got Sous Vide Questions? We’ve Got Answers.
Even after you get the hang of what sous vide is, a few questions always seem to pop up. We hear them all the time. Let's tackle them head-on so you can clear up any lingering doubts and start cooking with total confidence.
Is Sous Vide Cooking Actually Safe?
Getting straight to the point: is this low-temperature method truly safe? The answer is a resounding yes—as long as you do it right. Sous vide isn't just cooking your food; it's pasteurizing it. By holding food at a precise temperature for a specific amount of time, we effectively eliminate harmful bacteria.
This is the science that allows us to serve a perfectly juicy chicken breast cooked at just 150°F—well below the traditional 165°F—without a single worry. It's all about time and temperature working together.
Can You Overcook Food with Sous Vide?
This is another big one. While it’s nearly impossible to overcook food in the traditional sense (think dry, burnt, or rubbery), you can definitely alter the texture if you’re not careful. Think of it this way: temperature controls the doneness, but time controls the tenderness.
If you leave a steak in the water bath for eight hours, it’ll still be a perfect medium-rare inside. However, the prolonged heat will break down the muscle fibers so much that it might turn mushy. It’s always best to stick within the recommended time frames to get that perfect bite.
Do I Really Need a Vacuum Sealer?
One of the biggest myths holding people back from trying sous vide is the idea that you need an expensive, high-end vacuum sealer to get started. That’s just not true.
For most home cooks, the water displacement method is a fantastic—and completely free—alternative. All you need is a good quality zip-top freezer bag. By slowly lowering the bag into the water, the pressure of the water itself forces all the air out, creating a nearly perfect seal without any fancy equipment. It makes sous vide approachable, easy, and affordable for anyone.
At Culinary Collective Atl, we rely on precision techniques like sous vide to guarantee flawless consistency and quality for every single event. Ready to see what this level of detail can bring to your next dinner party or corporate gathering? Explore our private chef services and let’s create something unforgettable.