


Absolutely. Freezing Brussels sprouts is one of my go-to kitchen strategies for locking in that peak-season flavor and keeping nutrients intact for months. The secret weapon here is blanching them before they hit the freezer—it’s the key to preserving their fantastic texture and bright green color, turning them into a meal prepper's dream ingredient.
Why Freezing Brussels Sprouts Is a Game Changer
Learning how to properly freeze Brussels sprouts isn't just a neat storage trick; it's a total game-changer for any home cook. It means you can confidently stock up when they're fresh, in season, and affordable, knowing you’ll always have a delicious, nutrient-dense vegetable ready to go for a quick weeknight dinner. This simple process stretches their shelf life way beyond the couple of weeks they might last in the fridge.
While freezing produce feels modern, the concept has been around for a while. It really took off commercially after World War II. As industrial flash-freezing technology improved in the 1950s, the market for frozen foods exploded, jumping from around $1.7 billion to over $6 billion in just over a decade. This shift made it possible to enjoy vegetables with short harvest windows, like Brussels sprouts, all year long.
Key Benefits of Freezing Sprouts
Freezing is a fantastic preservation method that brings some serious advantages to the modern kitchen. It goes beyond convenience, helping you build smarter, more sustainable cooking habits.
- Cuts Down on Food Waste: Got a huge bag of sprouts you know you won't get to? Freezing them before they turn is one of the simplest and most effective food waste reduction strategies you can adopt in your kitchen. Nothing gets tossed.
- Saves You Time and Money: Buying in season is always cheaper. Prepping a big batch of sprouts all at once gives you a ready-to-cook ingredient for future meals, saving you precious time on those nights when you just can't be bothered to chop.
- Locks in Nutrients: Blanching and flash-freezing right after harvest is incredibly effective at preserving the vitamins and minerals in Brussels sprouts. You get a real nutritional punch in every serving, even months later.
Expert Tip: A well-stocked freezer is a meal prepper's secret weapon. Having veggies like Brussels sprouts ready to roast or sauté is often the one thing that stands between you and a less-than-healthy takeout order on a busy weeknight.
Choosing and Prepping Your Sprouts for Freezing
The secret to perfectly frozen Brussels sprouts starts long before they ever see the inside of your freezer—it begins right at the grocery store or farmers' market. Seriously, picking the right raw ingredients is probably the single most important thing you can do to guarantee a great final product. Once you know what to look for, you’re already halfway to freezing success.
You want sprouts that are firm, compact, and a vibrant, healthy green. A good sprout will feel surprisingly heavy for its size, almost like a tiny, dense cabbage. Steer clear of any with yellowing leaves, black spots, or a loose, wilted look. Those are all signs of age and will lead to a mushy texture and off-flavor after freezing.
Prepping Your Sprouts for the Freezer
Once you get your beautiful sprouts home, it’s time for a quick but crucial prep session. This part is all about making sure they're clean, uniformly sized, and ready for whatever freezing method you choose. Trust me, taking a few extra minutes here makes a huge difference later.
First up, give them a good rinse under cold, running water to wash off any dirt or grit hiding in the leaves. After they're clean, you can start trimming.
- Snip the Stem: Just slice off the tough, woody bottom end of each sprout.
- Peel Outer Leaves: Pull off any loose, damaged, or yellowed outer leaves. You want to get down to the tightly packed, bright green layers underneath.
The whole point of prepping is to create a clean, uniform product. By ditching the tough stem and any sad-looking outer leaves, you’re making sure every single sprout you freeze is top-quality. This is what leads to better results when you finally cook them.
If you’ve ever thought about growing your own to freeze, understanding how to cultivate similar brassicas is a huge help. For example, learning how to grow cabbage can teach you a lot of the fundamentals.
Why Sorting by Size Matters
After trimming, take a moment to sort your Brussels sprouts by size. I know, it sounds a little fussy, but it’s the key to getting consistent results, especially if you plan on blanching them. Just group them into small, medium, and large piles.
Think about it: smaller sprouts (around 1 inch in diameter) are going to cook much faster than larger ones (1.5 inches or more). By blanching each size group separately, you stop the little guys from turning to mush while you’re waiting for the big ones to cook through.
This simple step ensures that every single sprout, no matter its size, is perfectly blanched. It preserves that ideal texture and vibrant green color, making your frozen stash so much better to cook with down the road. It’s the difference between evenly roasted sprouts and a pan of mixed results.
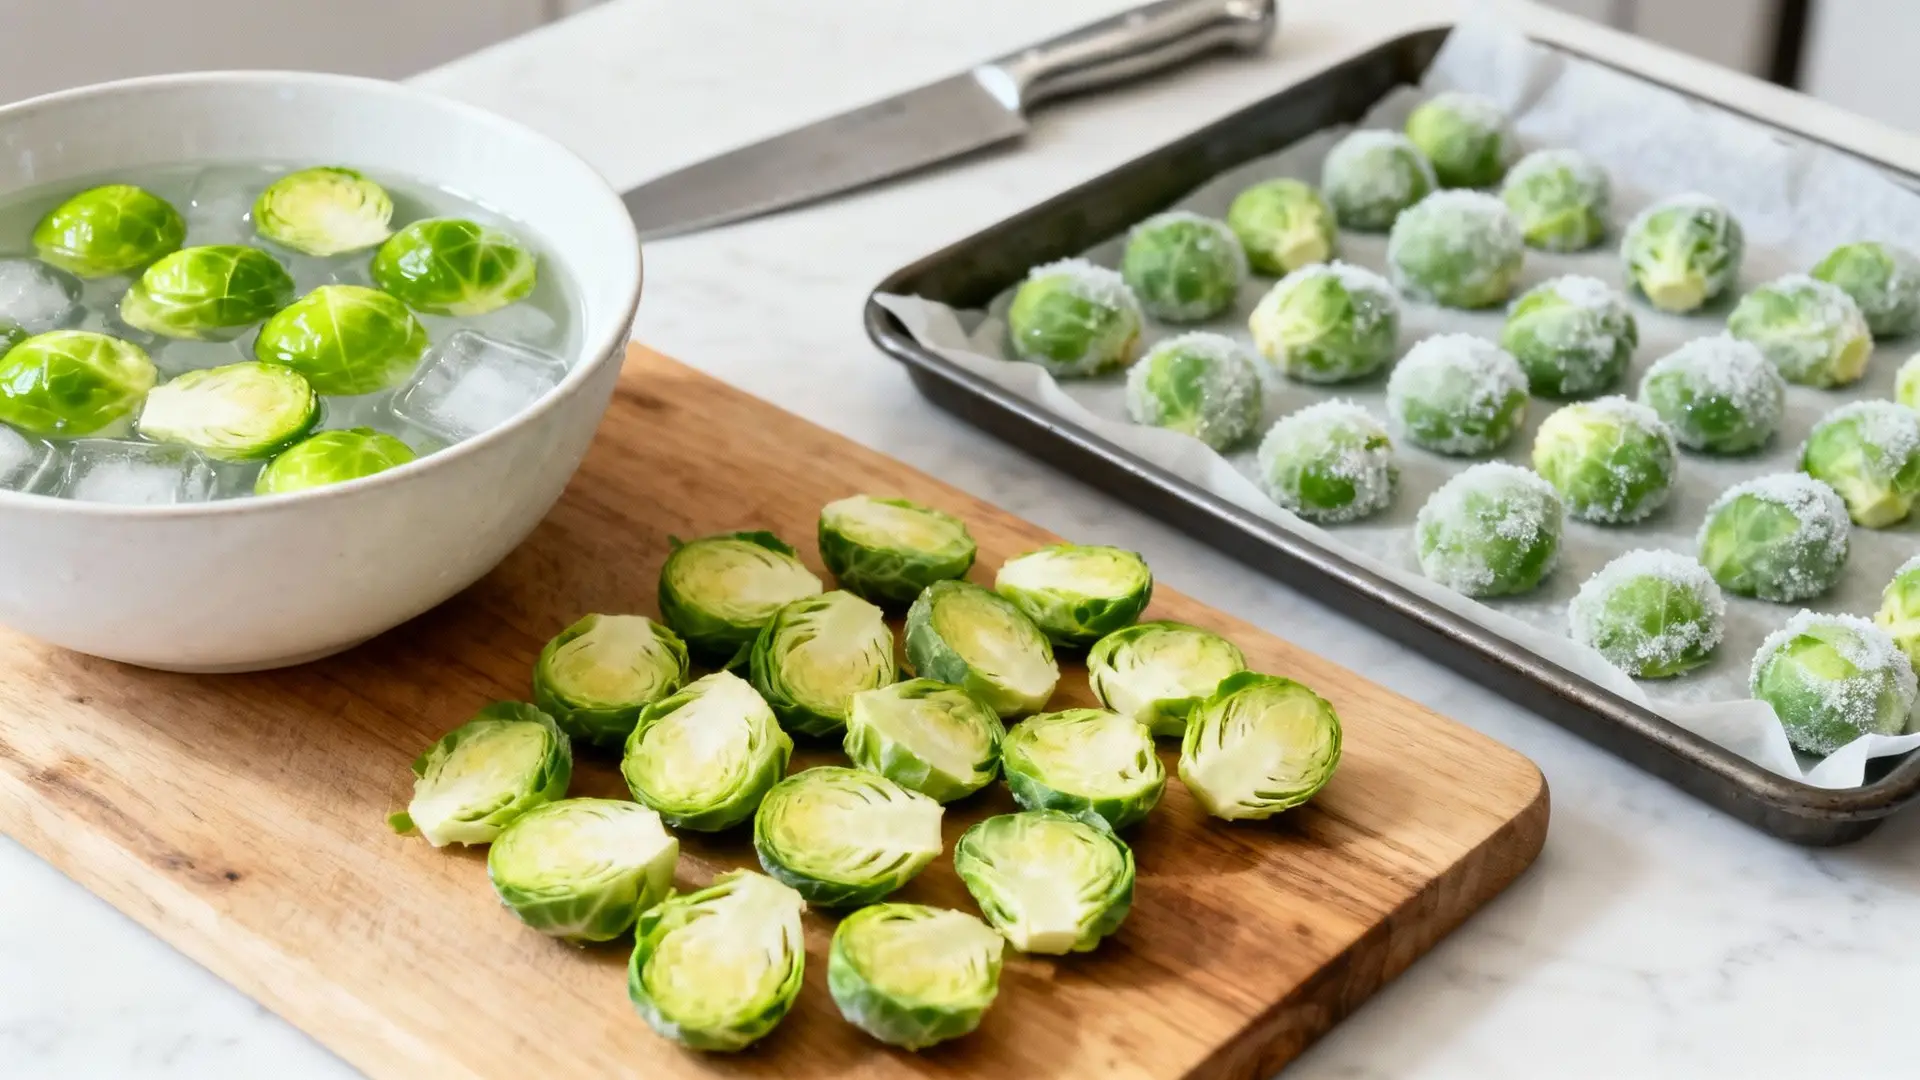
Mastering the Blanching Method for Best Results
If you plan to freeze Brussels sprouts for more than a few weeks, blanching is the one step you absolutely cannot skip. It might sound like a fussy, chef-y term, but it’s a simple technique that makes a massive difference in the quality of your frozen veggies down the line. That quick dip in boiling water is your secret weapon for locking in their vibrant green color, crisp-tender texture, and deliciously nutty flavor.
So, what’s really going on here? Blanching halts the natural enzymes inside the sprouts. If you just toss them into the freezer raw, those enzymes keep working, slowly degrading the vegetable. The result? Faded color, weird off-flavors, and a mushy texture when you finally get around to cooking them. A few minutes of blanching stops that process cold.
The Why Behind a Perfect Blanch
Think of blanching as hitting the "pause" button on your vegetables. You’re only cooking them long enough to neutralize those pesky enzymes without actually cooking them all the way through. It's a bit of a balancing act, but it's incredibly easy to get right.
This is the key to making sure the sprouts you pull out in January taste almost as fresh as the ones you picked up in October. It's the same idea we use for preserving lots of other garden goodies, which you can see in our guide on how to freeze fresh zucchini.
Before you even think about boiling water, though, your sprouts need to be prepped and ready.
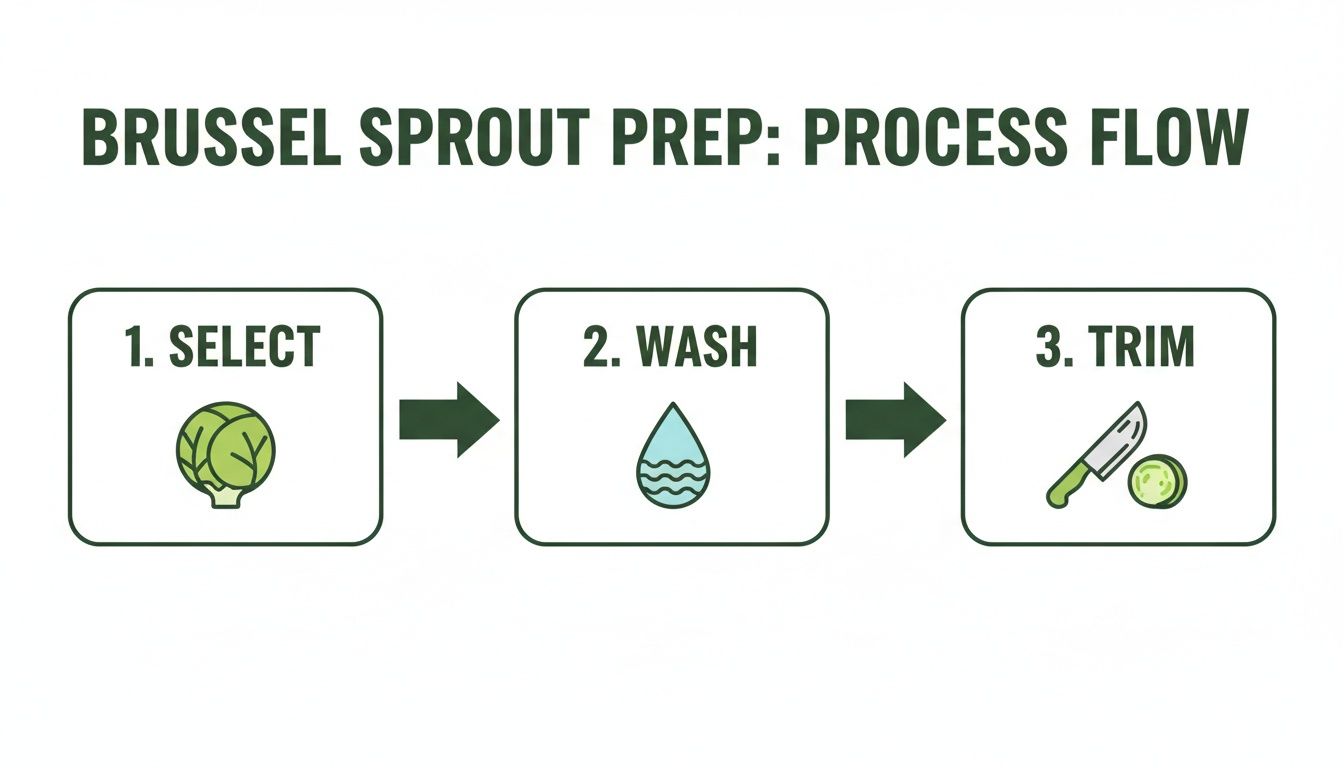
This simple flow of selecting, washing, and trimming ensures every sprout is perfectly primed for its quick dip.
Your Blanching and Cooling Toolkit
To get started, you'll need a large pot for the boiling water and a big bowl filled with ice water—this is your "ice bath." The quick-chill step is just as critical as the boiling part. It slams the brakes on the cooking process instantly, which is how you lock in that gorgeous, bright green color.
Here’s the simple gear you’ll need to have on hand:
- A Large Stockpot: Fill it about two-thirds full of water and get it to a roaring boil.
- A Slotted Spoon or Spider Strainer: This is your best friend for moving sprouts from the hot water to the ice bath quickly and safely.
- A Big Bowl of Ice Water: Don't be shy with the ice here. You want that water to be shockingly cold.
Once your water is boiling furiously, carefully lower a batch of your sorted Brussels sprouts into the pot. The key is not to overcrowd it, which can cause the water temperature to plummet.
The goal is to keep the water at a steady, rolling boil the entire time. Working in smaller, manageable batches is the best way to maintain that temperature and get perfect, consistent results every single time.
Timing is Everything
How long you blanch your sprouts depends entirely on their size, which is why sorting them earlier was such an important step. If you over-blanch, they'll turn soft. If you under-blanch, you won't fully deactivate those enzymes.
Blanching Time Guide For Brussels Sprouts
Getting the timing just right is the difference between perfectly preserved sprouts and a mushy mess. Use this table as your go-to guide for perfect texture every time.
| Sprout Size (Diameter) | Recommended Blanching Time | Best For |
|---|---|---|
| Small (around 1 inch) | 3 minutes | Roasting whole, quick sautés |
| Medium (1 to 1.5 inches) | 4 minutes | Halving for roasting or adding to stews |
| Large (over 1.5 inches) | 5 minutes | Quartering for sheet pan dinners |
This quick reference makes it easy to adjust on the fly based on what you bought at the market.
As soon as your timer dings, use that spider strainer to scoop the sprouts out and plunge them directly into the ice bath. Let them chill out for the same amount of time they were in the boiling water. Once they're completely cold to the touch, drain them well and spread them out on a clean kitchen towel to dry. Getting them as dry as possible is the final secret to preventing dreaded ice crystals from forming in the freezer.
When to Freeze Brussel Sprouts Without Blanching
While blanching is hands-down the gold standard for long-term quality, there are definitely times when you can get away with freezing Brussels sprouts completely raw. This no-blanch method is a fantastic shortcut, but it’s crucial to understand the trade-offs before you toss your entire harvest into the freezer.
The main reason to skip blanching? You're dealing with short-term storage and have a specific cooking plan in mind.
If you know for sure you’ll be using the sprouts within 4 to 6 weeks, freezing them raw is perfectly fine. The enzymes that blanching stops won't have enough time to seriously degrade the color, flavor, or texture. This makes it an amazing option when you've bought a few too many sprouts for the week and just need to hit the pause button on them.
The Pros and Cons of Going Raw
The biggest win for this method is speed. You literally just wash, trim, dry, and freeze. Done. But, you'll notice some differences in the final cooked product. Raw-frozen sprouts tend to develop a stronger, more "cabbage-like" flavor and will have a noticeably softer texture once cooked.
- Pro: It's incredibly fast and requires almost no equipment.
- Con: You'll end up with a softer, less crisp texture after cooking.
- Pro: Perfect for preserving a small batch when you're short on time.
- Con: The flavor can become more pungent the longer they sit in the freezer.
This method works for certain vegetables, but it's always good to know the rules for different types. For instance, our guide on if fresh asparagus can be frozen dives into similar trade-offs for another garden favorite.
Best Uses for Raw-Frozen Sprouts
The key to making the no-blanch method work for you is picking the right cooking technique—one where a softer texture isn't a deal-breaker.
High-heat roasting is the absolute best way to use them. When you toss raw-frozen sprouts directly onto a blazing hot sheet pan at 400°F (204°C), the intense heat helps drive off moisture in a flash. This lets the edges get crispy and beautifully caramelized, which makes the softer interior much less obvious. They're also excellent additions to blended soups or creamy gratins where a tender, yielding texture is exactly what you want.
Key Takeaway: The secret to freezing Brussels sprouts raw is all about managing your expectations. Use this trick for speed and convenience when you plan to cook them soon, especially for high-heat roasting where any texture changes won't matter. For long-term storage, always, always stick with blanching.
Time to Flash Freeze and Store for the Long Haul
Alright, your Brussels sprouts are blanched and perfectly dry. Now for the step that makes all the difference: flash freezing. This is the secret to preventing them from turning into one giant, frozen brick in the bag, giving you perfectly portionable sprouts every time.
It's surprisingly simple. Just spread your cooled, dry sprouts in a single layer on a baking sheet lined with parchment paper. The key here is to give them some personal space—make sure none of them are touching.
Slide that tray into the freezer for about 1 to 2 hours, or until each sprout is frozen solid. This quick-chill process is what keeps them separate and easy to use later. It’s the same principle behind commercial freezing methods, where rapid cooling is everything. For those working on a much larger scale, a guide to commercial blast chillers shows just how critical speed is.
Trust me, this one step transforms your ability to freeze Brussels sprouts at home. No more hacking away at a frozen veggie block!
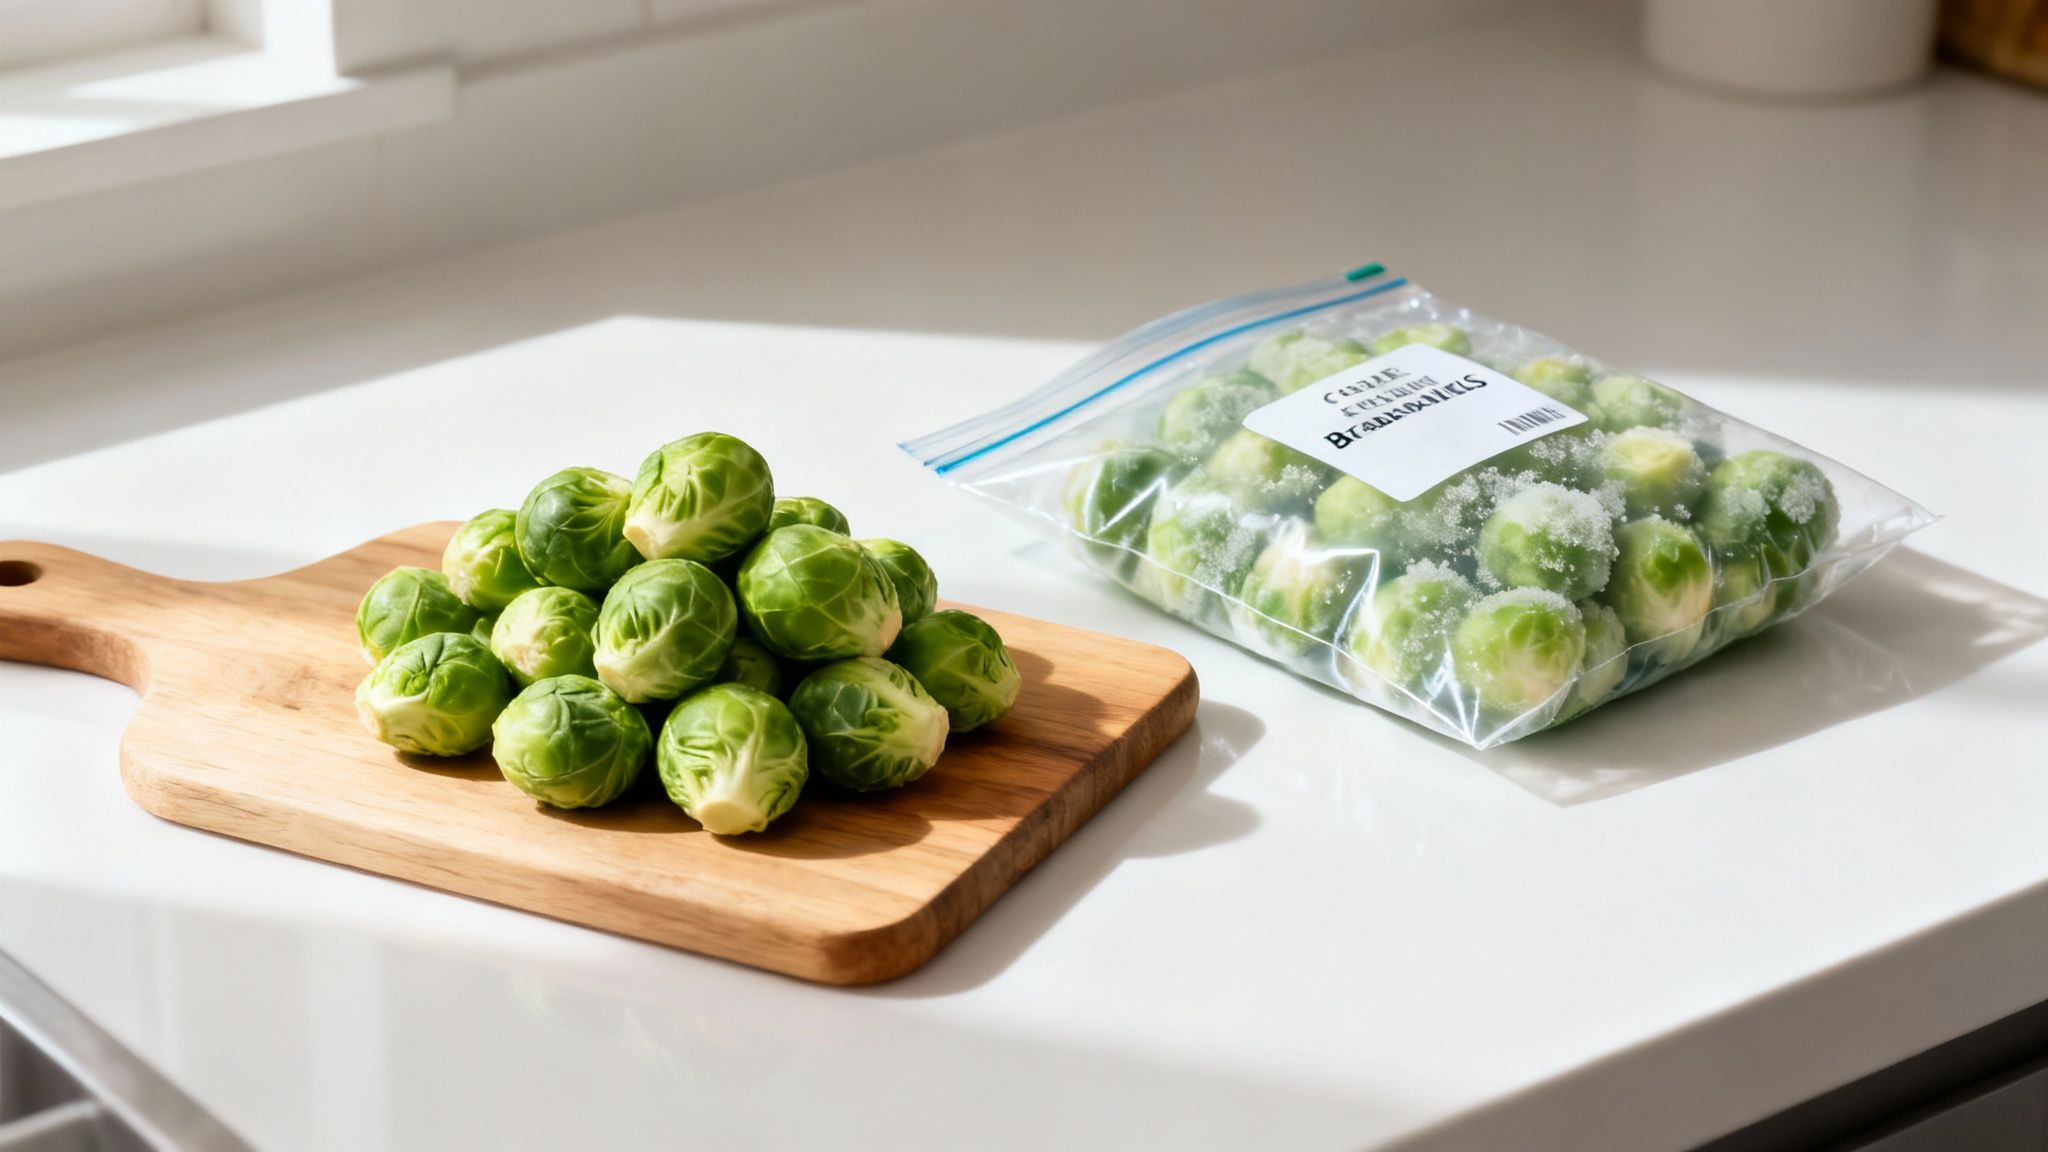
Choosing the Best Container for Long-Term Storage
Once your sprouts are individually frozen, it's time to pack them up for their long stay in the freezer. The container you choose will directly impact how well they hold up against freezer burn.
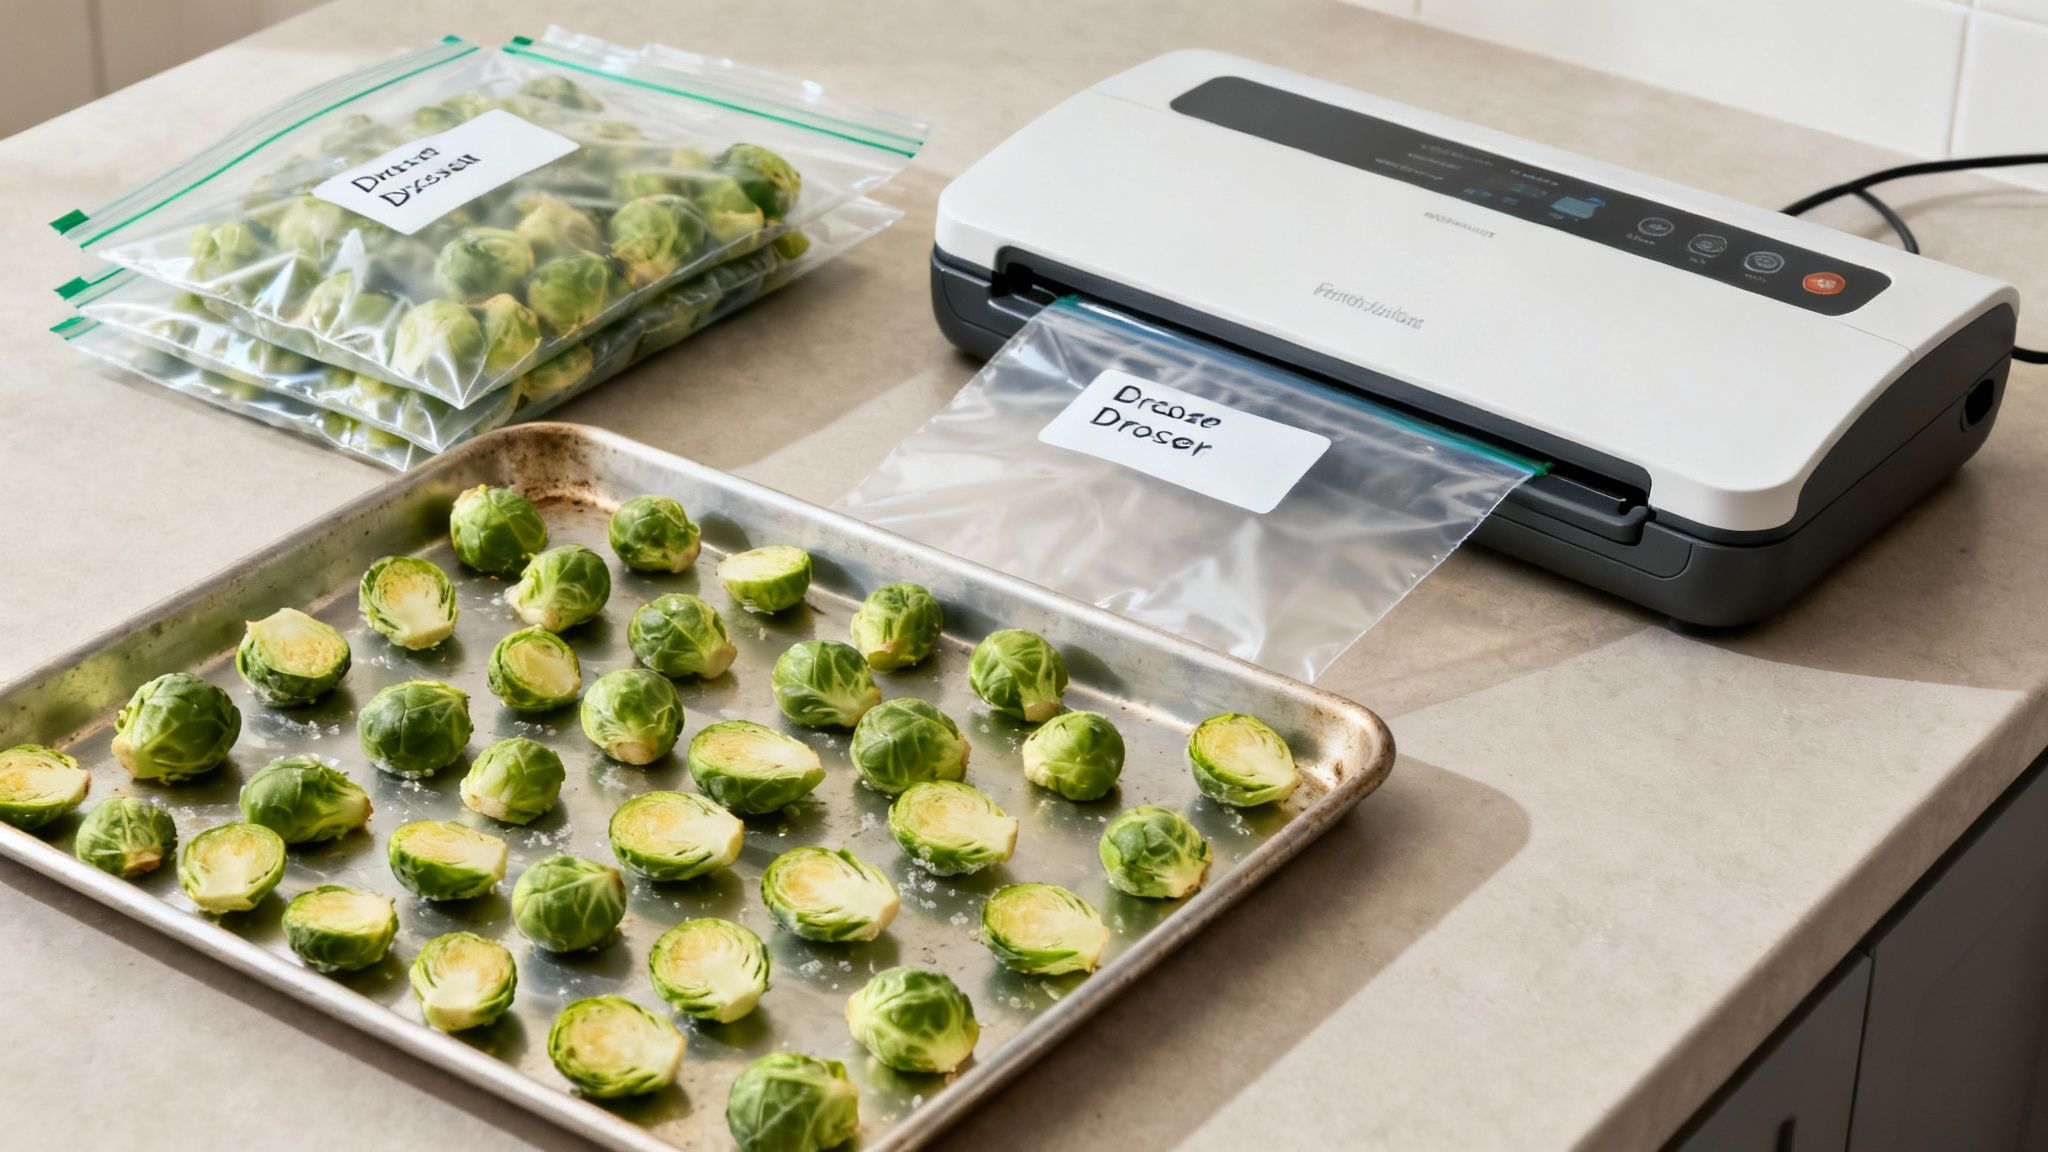
- Freezer Bags: These are the straightforward, budget-friendly choice. Squeeze out every last bit of air before you zip them up to keep ice crystals from forming. I find the double-zipper bags give a little extra peace of mind.
- Vacuum-Sealed Bags: This is the undisputed champion of freezer storage. By sucking out all the air, you dramatically cut down the risk of freezer burn. Sprouts stored this way can stay fresh-tasting for a year or even longer.
- Rigid Containers: If you prefer to avoid plastic bags, freezer-safe glass or plastic containers are a solid alternative. Just remember to leave about a half-inch of headspace at the top to allow for expansion as they freeze.
My Personal Tip: I’m a huge fan of vacuum sealing. Yes, it’s an extra step, but there's nothing better than pulling out a bag of sprouts eight months later and seeing them look just as green and vibrant as the day I prepped them. It’s completely worth the effort.
Labeling and Storing for Peak Quality
Don’t skip this final, crucial detail. Labeling saves you from playing "freezer roulette" months down the line. Grab a permanent marker and write the contents and the date you froze them right on the bag or container.
When you're ready to store them, lay the packages flat. This little trick really helps maximize your freezer space. When properly blanched and stored, your Brussels sprouts will maintain fantastic quality for 9 to 12 months.
This long shelf-life is a big reason for their growing popularity. In fact, the global export value of Brussels sprouts jumped by over 50% between 2018 and 2022. It's a clear sign that modern preservation techniques work, allowing more people to enjoy this fantastic vegetable year-round. Following these simple steps ensures every sprout you freeze is a quality ingredient ready for its moment on the dinner plate.
How to Cook with Frozen Brussel Sprouts
Alright, now for the fun part—actually cooking with the Brussels sprouts you so carefully prepped! I'm going to give you my number one, non-negotiable rule for cooking your frozen stash: do not thaw them first.
Seriously. Cooking them straight from the freezer is the only way to get that crispy, delicious texture we all love. It's the secret to avoiding a soggy, mushy mess.
When you let frozen sprouts thaw, the ice crystals melt and flood them with water. No matter how you cook them after that, you’re essentially steaming them. By putting them directly into a hot pan or oven, the intense heat vaporizes that surface moisture instantly, allowing the sprouts to get a beautiful sear instead of turning into a watery disappointment.
Best Ways to Cook Frozen Sprouts
High heat is your best friend here. The goal is to get a deeply caramelized, crispy exterior that contrasts perfectly with the tender inside.
- Roasting (The Gold Standard): This is my go-to method. Toss the frozen sprouts with olive oil, salt, and pepper right on the baking sheet. Get them into a preheated oven at 425°F (220°C) for 20-25 minutes, flipping them about halfway through. That high heat is what gets them beautifully browned and crisp.
- Sautéing: If you need a quick side dish, this works great. Heat some oil in a large skillet over medium-high heat. Add the frozen sprouts in a single layer, season them up, and let them cook for 5-7 minutes per side until they develop a nice, deep brown crust.
- Air Frying: This is a fantastic option for getting them extra crispy. Just toss the frozen sprouts in a little oil and your favorite seasonings, then air fry at 375°F (190°C) for about 15 minutes. Make sure to shake the basket a few times to get them evenly cooked.
One thing to keep in mind: you’ll need to adjust your cooking time. Plan on adding about 5-10 extra minutes compared to cooking fresh sprouts to make sure they’re heated all the way through to the center.
Tossing Them Into Your Meals
Your freezer stash is so much more than a simple side dish. Think of it as your secret weapon for weeknight meals.
You can throw them into soups and stews during the last 15 minutes of simmering for an easy nutritional boost. They're also perfect for sheet pan dinners—just add them to the pan with your protein and other veggies, adjusting the cook time as needed.
Once you learn how to freeze Brussels sprouts, you open up a world of easy, delicious meal possibilities.
Answering Your Top Questions About Freezing Brussels Sprouts
Even with a solid game plan, a few questions always pop up when you’re freezing vegetables for the first time. Let's tackle some of the most common ones I hear from clients.
Can You Refreeze Thawed Brussels Sprouts?
This is probably the number one question, and the answer is a firm no. Once they've thawed, the cell walls have already softened. Refreezing them breaks them down even further, leaving you with a mushy, watery mess that nobody wants on their plate. It’s a one-way trip to the freezer!
Why Do My Frozen Sprouts Smell So Strong?
Ever noticed a potent, cabbage-like smell from your frozen sprouts? That’s completely normal. It’s especially common if you froze them raw, as the enzymes responsible for that classic brassica aroma are still active. A quick blanch before freezing is your best defense—it neutralizes those enzymes and tones down the smell significantly.
Help! What Are These White Patches on My Sprouts?
If you spot dry, white, or icy patches on your sprouts, you’re looking at freezer burn. It happens when air gets to the food, drawing out moisture. While they’re still perfectly safe to eat, those burned spots will have a dry, tough texture and a slightly off-flavor.
My Pro Tip: The secret to avoiding freezer burn is getting as much air out of the bag as humanly possible before sealing it. If you do see some freezer burn starting to form, don't toss the whole batch! Just plan to use those sprouts soon in something like a soup or a creamy gratin where the texture change won't be as noticeable.
Should I Freeze Sprouts That Are Turning Yellow?
It’s tempting to try and "save" produce that’s on its way out, but freezing isn't a time machine—it only preserves the quality of what you start with. If your sprouts are already yellowing, losing their firmness, or looking a bit sad, they won't magically perk up in the freezer.
A good rule of thumb I always follow: If you wouldn't want to eat it fresh today, don't freeze it for later. Always start with the freshest, greenest, and tightest Brussels sprouts you can find for the best results.
Ready to skip the prep and enjoy expertly crafted meals at home? The chefs at Culinary Collective Atl specialize in creating personalized dining experiences and meal prep solutions that fit your lifestyle. Explore our private chef services.