


Chef’s Secrets: The 8 Best Way to Store Fresh Herbs for Maximum Flavor in 2025
In the world of high-end culinary arts, fresh herbs are the lifeblood of flavor, transforming a simple dish into an unforgettable experience. For private chefs and discerning home cooks, the challenge isn’t just sourcing the best ingredients; it’s maintaining their peak freshness. Limp cilantro, browned basil, and wilted mint can compromise the integrity of a meticulously planned menu, making professional storage techniques a non-negotiable skill.
The question we hear most often is, ‘What is the absolute best way to store fresh herbs to extend their life without sacrificing flavor or texture?’ The truth is, there isn’t one single answer. The optimal method depends on the herb type, your kitchen’s workflow, and your culinary application. To truly unlock the peak flavor of your fresh herbs, it’s essential to understand the core principles of preservation. Much like high-quality loose-leaf tea, herbs require careful management of key environmental variables. Understanding how to protect against the factors affecting freshness like air, light, moisture, and heat is the first step toward culinary excellence.
This definitive guide moves beyond generic advice, offering a professional roundup of eight distinct, chef-vetted methods designed for practical application in demanding culinary environments. We will break down the science, pros, cons, and step-by-step implementation for each technique. Our goal is to ensure your herbs remain as vibrant as the day they were picked, whether you’re prepping for an intimate dinner party or a week-long corporate retreat.
1. Water Glass Method (Bouquet Storage)
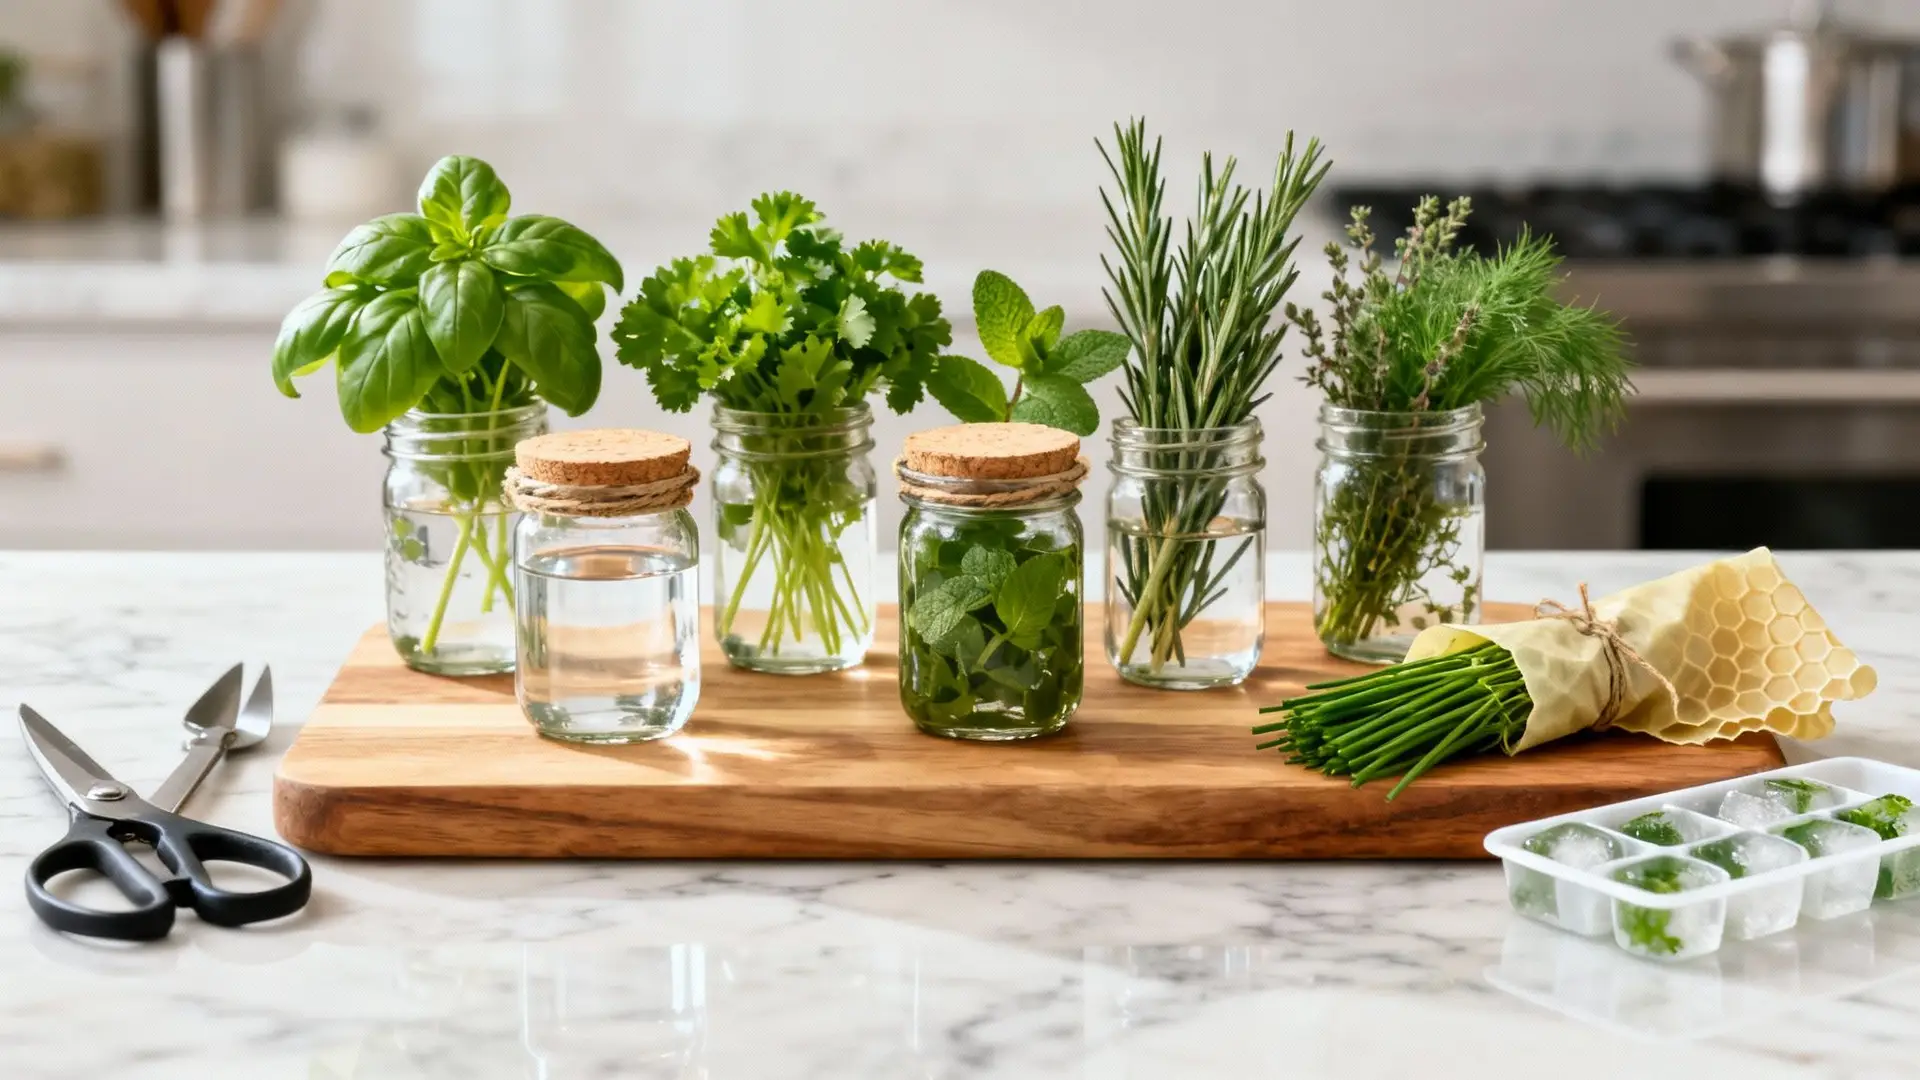
The Water Glass Method, often called “bouquet storage,” is a classic culinary technique for a reason: it’s simple, effective, and visually appealing. This approach treats delicate herbs like cut flowers, keeping their stems hydrated and leaves vibrant. By placing trimmed herb stems in a glass or jar with an inch of fresh water, you provide a continuous source of moisture, preventing the wilting and decay that often happens within a day or two of purchase.
This method is the best way to store fresh herbs with soft, tender stems, such as parsley, cilantro, dill, mint, and tarragon. For basil, a notoriously sensitive herb, this technique is a game-changer, but with one key difference: it must be kept at room temperature. Refrigeration turns basil leaves black almost instantly. For all other tender herbs, placing the bouquet in the refrigerator provides the ideal cool, humid environment.

Step-by-Step Instructions
- Trim the Stems: Upon bringing the herbs home, snip off the bottom half-inch of the stems, preferably at a 45-degree angle. This fresh cut allows for maximum water absorption.
- Add Water: Fill a small glass or jar with about one to two inches of cool water.
- Arrange the Bouquet: Place the trimmed herbs into the water, ensuring the stems are submerged but the leaves remain dry.
- Cover Loosely (for refrigeration): If storing in the fridge, gently place a reusable plastic bag or produce bag over the top of the herbs. This creates a mini-greenhouse, trapping humidity without crushing the leaves. Do not seal the bag tightly.
- Store Appropriately: Place the jar on a refrigerator shelf (for most herbs) or on your kitchen counter away from direct sunlight (for basil).
Chef’s Insight: Michelin-starred kitchens often use this method for their mise en place stations. Having bouquets of parsley, chives, and cilantro ready for garnish ensures peak freshness and saves critical seconds during service.
Pros and Cons
- Pros: Significantly extends herb life (up to 2 weeks), keeps leaves crisp and flavorful, visually accessible so you don’t forget them in the crisper drawer.
- Cons: Takes up more vertical space in the refrigerator, requires water changes every 2-3 days, not suitable for woody herbs like rosemary or thyme.
This technique is a cornerstone of professional kitchen efficiency and a simple way to minimize spoilage at home. Mastering it is a key step in developing effective food waste reduction strategies. For private chefs, preparing herb bouquets the morning of an event ensures garnishes and ingredients are at their absolute best.
2. Damp Paper Towel & Plastic Bag Method
The Damp Paper Towel & Plastic Bag Method is a space-efficient and highly effective technique relied upon by chefs and avid home cooks alike. This approach creates a perfect micro-environment for herbs by providing gentle, consistent hydration from the damp towel while the bag or container traps humidity, slowing down the wilting and degradation process. It’s the best way to store fresh herbs when refrigerator space is at a premium.
This method is particularly versatile, working well for both tender herbs like cilantro and parsley and heartier, woody-stemmed herbs such as thyme, oregano, and rosemary. By wrapping the herbs carefully, you protect their delicate leaves from bruising and prevent them from drying out in the cold, circulating air of a refrigerator. It’s a foundational technique for anyone serious about minimizing food waste and maximizing flavor.
Step-by-Step Instructions
- Wash and Dry Gently: Rinse herbs under cool water and pat them thoroughly dry with a clean cloth or give them a gentle spin in a salad spinner. Excess moisture can lead to mold.
- Moisten Paper Towel: Lightly dampen a sheet of paper towel. It should be moist to the touch, not dripping wet. Squeeze out any excess water.
- Wrap the Herbs: Lay the herbs in a single layer on the damp towel and loosely roll them up, creating a neat bundle.
- Seal for Storage: Place the wrapped herb bundle inside a zip-top bag, reusable silicone bag, or an airtight container. Press out most of the air before sealing.
- Refrigerate: Store the bag in your refrigerator, preferably in the crisper drawer or on a door shelf where the temperature is slightly warmer.
Chef’s Insight: Professional catering companies and meal prep services in Atlanta rely on this method for its reliability and scalability. When preparing hundreds of meals for delivery, pre-wrapping herbs ensures they arrive at the client’s home just as fresh as when they left the kitchen.
Pros and Cons
- Pros: Extends herb life significantly (1-3 weeks), space-efficient for crowded refrigerators, protects delicate leaves from bruising, works for a wide variety of herbs.
- Cons: Requires checking every few days to ensure the towel has proper moisture, risk of mold if herbs are too wet initially, less visually appealing than the bouquet method.
This technique is a cornerstone for efficient kitchen prep. For private chefs managing inventory for a week-long vacation client, labeling these herb bags with the date and type is crucial. It ensures every ingredient is used at its peak, providing the high-quality experience clients expect.
3. Herb Keeper or Produce Keeper Containers
For those who value precision and optimized design, dedicated herb keepers are the ultimate tool for preserving freshness. These specialized containers, popularized by brands like OXO and Progressive, are engineered to create the perfect microenvironment for herbs. They typically feature a water reservoir at the base to keep stems hydrated, along with ventilated inserts that promote air circulation and prevent the leaves from becoming waterlogged or crushed.
This method combines the hydration benefits of the water glass method with the controlled humidity of a sealed container, offering a highly effective, all-in-one solution. Herb keepers are an excellent investment for both home cooks and professional chefs who regularly work with a variety of herbs and need a reliable, space-efficient way to store them. They are particularly useful for delicate herbs like cilantro, parsley, and mint, but also work well for heartier types.
Step-by-Step Instructions
- Prepare the Herbs: Gently wash and pat the herbs dry. Trim the bottom inch of the stems, similar to preparing a flower bouquet.
- Fill the Reservoir: Add fresh, cool water to the fill line in the base of the container, following the manufacturer’s instructions.
- Place Herbs Inside: Arrange the herbs loosely in the inner basket or holder, ensuring the stems reach the water reservoir. Avoid over-packing to allow for proper airflow.
- Seal and Store: Close the lid to create a controlled environment and place the entire container in the refrigerator, preferably on a shelf rather than in a crowded drawer.
- Maintain: Change the water every few days to a week to prevent bacterial growth and maintain optimal freshness.
Chef’s Insight: Catering companies and private chefs rely on these containers for event prep. For corporate events or vacation rental stocking, having neatly organized herb keepers ensures ingredients stay vibrant for days, reducing waste and guaranteeing high-quality results.
Pros and Cons
- Pros: Creates an ideal humidity and hydration balance, extending herb life up to 3 weeks. The sturdy, stackable design protects delicate leaves from being crushed and helps organize the refrigerator.
- Cons: Higher initial cost compared to other methods. The containers can be bulky and require specific cleaning.
Beyond specialized herb keepers, understanding effective general food storage is crucial. For a commercial perspective on selecting containers that ensure food safety, freshness, and efficiency, you might find valuable insights in guides for restaurant food storage bins. This is a professional-grade best way to store fresh herbs, offering consistency and superior longevity.
4. Freezer Storage (Ice Cube & Herb Butter Methods)
Freezer storage is the ultimate solution for long-term herb preservation, locking in flavor for months. This approach involves chopping herbs and freezing them in a liquid medium like water or oil, or blending them into butter. While freezing alters the delicate texture of fresh herbs, making them unsuitable for fresh garnishes, it perfectly preserves their aromatic compounds for use in cooked dishes. This method is the best way to store fresh herbs when you have a large surplus that you can’t use within a week or two.
This technique is incredibly versatile and works well for most herbs, both tender and hardy. It is especially effective for robust herbs like rosemary, thyme, oregano, and sage when suspended in oil, and for tender herbs like parsley, cilantro, dill, and chives when frozen in water or blended into butter. Professional meal prep companies and chefs often use this method for batch-producing soup starters, sauce bases, and compound butters, ensuring consistent flavor and efficiency.
Step-by-Step Instructions
- Wash and Dry: Thoroughly wash the herbs and pat them completely dry. Excess moisture can lead to freezer burn.
- Chop or Blend: Finely chop the herbs. For herb butter, blend the chopped herbs with softened, unsalted butter until well combined.
- Portion into Trays: Pack the chopped herbs tightly into ice cube tray compartments.
- Add Liquid: For ice cubes, pour water or olive oil over the herbs until they are fully submerged. For herb butter, simply pack the butter mixture into the trays.
- Freeze Solid: Place the tray in the freezer for at least 4-6 hours, or until completely solid. Once frozen, you can transfer the cubes to a labeled freezer-safe bag to save space, a technique also useful for preserving other produce. For more ideas, explore our guide on how to freeze fresh zucchini.
Chef’s Insight: Private chefs preparing for multi-day events or vacation clients often pre-make garlic-and-herb olive oil cubes. These can be tossed directly into a hot pan to start a sauce or sauté vegetables, infusing the dish with flavor from the very beginning and saving precious prep time on-site.
Pros and Cons
- Pros: Extends herb life for up to 6 months, creates convenient, pre-portioned amounts for cooking, captures peak-season flavor, excellent for reducing food waste.
- Cons: Changes the texture, making herbs unsuitable for fresh use; requires freezer space; not ideal for herbs with very high water content like mint unless blended into a butter.
This method transforms leftover herbs from a potential waste product into a valuable meal-prep asset. For anyone looking to streamline their cooking process, having these flavor bombs ready to go is a significant advantage.
5. Sealed Glass Jar with Paper Towel Method
The Sealed Glass Jar with a Paper Towel method is a hybrid technique that offers the best of both worlds: a humid, protected environment with controlled moisture. This approach involves lining a glass jar with a damp paper towel and sealing the herbs inside. The sealed container prevents dehydration and odor cross-contamination, while the paper towel absorbs excess moisture and releases it as needed, preventing both wilting and rot.
This method is exceptionally versatile and works well for both tender and hardy herbs, making it a favorite for farm-to-table restaurants and high-end catering companies that need to store a variety of herbs. It’s an excellent way to store fresh herbs like chives, cilantro, parsley, and even hardier types like oregano and thyme for extended periods. The glass jar also protects delicate leaves from being crushed in a crowded refrigerator.
Step-by-Step Instructions
- Wash and Dry: Gently wash the herbs under cool water and pat them thoroughly dry with a clean cloth or salad spinner. Excess water is the enemy here.
- Prepare the Jar: Take a clean, dry mason jar or glass container with a tight-sealing lid. Lightly dampen a paper towel, wringing out any excess water so it’s moist but not dripping.
- Line the Jar: Line the bottom and sides of the jar with the damp paper towel.
- Add Herbs: Loosely place the dry herbs into the jar on top of the paper towel. Avoid packing them too tightly to prevent bruising and allow for air circulation.
- Seal and Store: Secure the lid tightly and store the jar in the main body of your refrigerator, where the temperature is most stable.
Chef’s Insight: For high-end private events, we prepare multiple glass jars of specific herbs for different courses. This keeps them impeccably fresh and also creates a visually appealing and organized mise en place station that reflects a high standard of culinary practice.
Pros and Cons
- Pros: Excellent longevity (up to 3 weeks), protects herbs from being crushed, prevents odor transfer in the fridge, and is suitable for a wide variety of herbs.
- Cons: Requires thorough drying of herbs to prevent mold, takes up more shelf space than a plastic bag, and needs checking every few days to ensure the paper towel’s moisture level is correct.
This technique is a cornerstone of sustainable culinary practices and a fantastic method for anyone serious about minimizing food waste. By mastering this storage solution, home cooks and professional chefs alike can ensure their ingredients remain vibrant and flavorful, making it one of the best ways to store fresh herbs for maximum shelf life and quality.
6. Herb Drying & Dehydration Methods
Drying is the time-honored technique for preserving herbs, transforming their fleeting freshness into a concentrated, shelf-stable ingredient. Whether through air-drying, oven dehydration, or using a dedicated food dehydrator, this method removes moisture, which inhibits microbial growth and locks in the aromatic oils responsible for flavor. While the taste profile changes, becoming more intense and earthy, dried herbs are a pantry staple essential for rubs, marinades, and long-cooking dishes.
This method is the best way to store fresh herbs with low moisture content and sturdy, woody stems. It works exceptionally well for robust herbs like oregano, rosemary, thyme, marjoram, and sage. Culinary traditions worldwide rely on this process; for example, the classic French Herbes de Provence blend is built upon a foundation of dried herbs that can withstand high heat and lengthy cooking times.
Step-by-Step Instructions
- Harvest and Clean: For optimal flavor, harvest herbs in the morning after the dew has evaporated but before the sun’s heat intensifies. Gently rinse and pat them completely dry.
- Prepare for Drying:
- Air-Drying: Gather small, loose bundles and tie the stems with kitchen twine.
- Oven/Dehydrator: Remove the leaves from the stems and spread them in a single, even layer on a baking sheet or dehydrator tray.
- Dry the Herbs:
- Air-Drying: Hang bundles in a dark, warm, and well-ventilated area for 1-3 weeks, or until the leaves are brittle and crumble easily.
- Oven: Place in the oven at its lowest temperature setting (around 150°F or 65°C) with the door slightly ajar for 1-4 hours. Check frequently to prevent burning.
- Store Properly: Once fully dried, gently crumble the leaves and transfer them to a clean, airtight glass jar.
- Label and Store: Label each jar with the herb name and the date. Store in a cool, dark place like a pantry or cabinet, away from heat sources like the stove.
Chef’s Insight: For corporate events with a sustainability focus, creating custom, house-dried herb blends as take-home gifts adds a memorable, handcrafted touch. A signature “event blend” can elevate the client experience beyond the meal itself.
Pros and Cons
- Pros: Creates a shelf-stable product that lasts for 6-12 months, concentrates flavor for use in robust dishes, an excellent no-waste solution for herb surpluses.
- Cons: Alters the flavor and texture significantly from fresh, not suitable for delicate, high-moisture herbs like cilantro or basil, can be a slow process (air-drying).
While it requires patience, mastering herb dehydration provides a private chef with a deep, flavorful pantry, ensuring you always have the right aromatic on hand for any culinary creation. It’s a foundational skill taught in culinary schools as an essential part of ingredient preservation and management.
7. Vacuum Sealing & Sous Vide Storage
Vacuum sealing is a high-tech preservation method that dramatically extends the life of fresh herbs by removing the primary culprit of decay: oxygen. This technique, heavily utilized in professional kitchens and popularized by the sous vide cooking movement, creates an anaerobic environment inside a sealed bag. By preventing oxidation and inhibiting the growth of aerobic bacteria and mold, it locks in the herbs’ color, flavor, and aromatic compounds with unparalleled efficiency.
This method is the best way to store fresh herbs for long-term planning, especially for hardier varieties like rosemary, thyme, sage, and oregano, which hold up well to the pressure. It’s also effective for tender herbs destined for sauces or infusions where perfect leaf structure is less critical. Renowned kitchens like Thomas Keller’s The French Laundry rely on vacuum sealing for precise ingredient control and to minimize waste, a practice now accessible to home cooks and private chefs alike.
Step-by-Step Instructions
- Prep the Herbs: Gently wash the herbs and pat them completely dry with a clean towel or use a salad spinner. Any residual moisture can cause ice crystals and freezer burn.
- Portion as Needed: Arrange the dry herbs in a single layer inside a food-grade vacuum-seal bag. Avoid over-packing, as this can bruise the leaves during sealing.
- Seal the Bag: Place the open end of the bag into the vacuum sealer machine according to the manufacturer’s instructions. The machine will extract the air and create a tight, heat-sealed closure.
- Label and Date: Use a permanent marker to label the bag with the herb type, quantity, and the date it was sealed. This is crucial for inventory management.
- Store for Later Use: Place the sealed bags flat in the refrigerator for short-term use (up to 3 weeks) or in the freezer for long-term preservation (6-12 months).
Chef’s Insight: For high-volume meal prep services, vacuum sealing weekly client portions of herbs ensures consistency and freshness upon delivery. Combining this with freezer storage allows for multi-month menu planning for large corporate events, locking in seasonal prices and availability.
Pros and Cons
- Pros: Offers the longest shelf life, especially when frozen; protects against freezer burn; locks in peak flavor and aroma; and saves significant space.
- Cons: Requires specialized equipment (a vacuum sealer); can crush very delicate herbs if not done carefully; single-use plastic bags create waste, although reusable options are available.
This technique is a cornerstone of modern culinary preservation, providing chefs with exceptional control over their ingredients. By mastering it, you can elevate your meal prep and storage efficiency, a key principle also found in sous vide cooking. Learn more about the precision and benefits of what is sous vide cooking.
8. Root Water Change Method (Stem Hydration System)
The Root Water Change Method is an advanced technique that elevates simple bouquet storage into a professional-grade preservation system. This approach borrows principles from botanical science and floristry, focusing on creating the perfect aquatic environment to maximize hydration and nutrient uptake through the stems. It goes beyond just placing herbs in water; it involves actively managing the water’s quality, temperature, and composition to dramatically extend the life and vibrancy of delicate herbs.
This method is the best way to store fresh herbs when absolute peak freshness is non-negotiable, making it ideal for high-stakes culinary events or for preserving expensive, hard-to-find herbs. By changing the water daily and sometimes amending it with a preservative, you prevent bacterial growth and provide a nutrient source, keeping herbs like cilantro, parsley, and mint in pristine condition. This level of care is standard in fine-dining kitchens where consistent quality is paramount.
Step-by-Step Instructions
- Prepare the Herbs: Trim the bottom half-inch of the herb stems at a 45-degree angle. Remove any leaves that would sit below the waterline to prevent rot.
- Prepare the Water: Use filtered or distilled water if possible. For optimal results, chill the water to between 45-50°F.
- Add Preservative (Optional): Create a simple floral preservative by mixing one tablespoon of sugar and a single drop of bleach into one quart of water. The sugar provides energy, while the bleach inhibits bacterial growth.
- Arrange and Store: Place the herbs in a clean jar with one to two inches of the prepared water. Cover loosely with a plastic bag and store in the refrigerator (except for basil).
- Daily Maintenance: This is the critical step. Change the water every single day with a fresh, chilled batch. Re-trim the stems every 2-3 days to ensure they can continue to absorb water effectively.
Chef’s Insight: For private chef services catering to multi-day events or vacation clients, this system ensures that the herbs used on the last day are just as vibrant as those used on the first. It’s a small detail that communicates an exceptional commitment to quality.
Pros and Cons
- Pros: Achieves the longest possible shelf life for tender herbs (often 2-3 weeks), maintains superior flavor and texture, prevents wilting and yellowing far more effectively than basic methods.
- Cons: Requires daily attention and maintenance, more labor-intensive, might be considered excessive for casual home use, takes up refrigerator space.
This meticulous technique is a testament to how controlling environmental factors can yield superior culinary results. It’s a method employed by professionals who understand that the quality of a final dish often begins with the perfect preservation of its simplest ingredients.
Fresh Herb Storage: 8-Method Comparison
| Method | Complexity 🔄 | Resources & Cost ⚡ | Effectiveness ⭐ | Expected Results 📊 | Ideal Use Cases 💡 |
|---|---|---|---|---|---|
| Water Glass Method (Bouquet Storage) | Low — simple setup, minimal skill | Low — glass jar & water | ⭐⭐⭐⭐ | 1–2 weeks; maintains color & hydration | Countertop access, private chefs, quick use |
| Damp Paper Towel & Plastic Bag Method | Medium — wrapping technique, moisture balance | Low — paper towels & bags | ⭐⭐⭐⭐ | 1–3 weeks; prevents wilting & browning | Caterers, meal-prep services, fridge storage |
| Herb Keeper / Produce Containers | Low — plug-and-play | Medium — $15–40 per container | ⭐⭐⭐⭐⭐ | Up to ~3 weeks; controlled humidity, low maintenance | Premium private chefs, organized prep kitchens |
| Freezer Storage (Ice Cubes & Herb Butter) | Medium — prep, portioning & freezing | Low–Medium — trays, oil/butter, freezer space | ⭐⭐⭐⭐ | 3–6 months; flavor preserved, texture altered | Long-term meal prep, stocks, sauces |
| Sealed Glass Jar with Paper Towel | Medium — assembly + occasional maintenance | Low — jars & towels (reusable) | ⭐⭐⭐⭐ | 2–3 weeks; eco-friendly, visible storage | Upscale chefs, sustainable presentation |
| Herb Drying & Dehydration Methods | Low–Medium — air drying easy; dehydrator faster | Low — drying space or dehydrator, jars | ⭐⭐⭐⭐⭐ | 6–12 months; concentrated flavor, not fresh-like | Pantry storage, seasonal planning, bulk preservation |
| Vacuum Sealing & Sous Vide Storage | High — equipment & technique required | High — $100–500+ sealer, bags | ⭐⭐⭐⭐⭐ | 2–3 weeks (refrig); 6+ months (frozen); superior preservation | High-volume pro kitchens, event catering |
| Root Water Change Method (Stem Hydration) | High — daily water changes & monitoring | Medium — containers, preservatives, temp control | ⭐⭐⭐⭐⭐ | 2–3 weeks with daily care; peak freshness maintained | Premium private chefs, upscale event caterers |
Elevating Your Culinary Craft with Perfect Herb Preservation
You’ve navigated the nuanced world of herb preservation, exploring eight distinct methods designed to extend the life and vibrancy of your most delicate ingredients. From the simple elegance of the Water Glass Method for tender bouquets of parsley and cilantro to the long-term ingenuity of freezing herb-infused butters and oils, the path to minimizing waste and maximizing flavor is now clear. We’ve deconstructed techniques ranging from modern marvels like vacuum sealing to timeless traditions like air-drying, providing you with a versatile toolkit for every culinary scenario.
The core lesson is this: there is no single best way to store fresh herbs for every situation. The optimal choice depends on the herb’s specific characteristics, your intended use, and your timeline. A private chef preparing for a week-long client engagement might lean on Herb Keepers and the Damp Paper Towel method for immediate access, while simultaneously freezing herb cubes for sauces and stews planned later in the week.
Key Takeaways: From Theory to Application
Mastering these techniques is about more than just saving a few dollars on produce; it’s a fundamental shift in how you manage your kitchen’s resources and elevate your craft. It’s the difference between a dish that tastes fresh and one that is fresh.
Let’s recap the most critical insights:
- Tender vs. Hardy Herbs: This is the foundational principle. Tender herbs like cilantro, parsley, and basil generally thrive with hydration (like the Water Glass Method), while woody, hardy herbs like rosemary and thyme prefer a drier, well-ventilated environment (like the Damp Paper Towel or Sealed Glass Jar methods).
- Short-Term vs. Long-Term Needs: Your timeline dictates your strategy. For herbs needed within the week, refrigerated methods offer the best preservation of fresh texture and flavor. For longer-term planning, freezing, drying, and vacuum sealing lock in flavor for months, albeit with a change in texture.
- Moisture is a Double-Edged Sword: While hydration is key for some herbs, excess moisture is the primary cause of rot and mold for all of them. Always ensure herbs are dry to the touch before storing them in enclosed containers and change paper towels or water as needed to prevent microbial growth.
Building Your Custom Herb Preservation System
The true value of this guide lies in its application. Don’t just pick one method and stick to it. Instead, build a flexible, multi-faceted system that adapts to your needs. A busy professional meal-prepping for the week might find the Damp Paper Towel method perfect for keeping cilantro crisp for Tuesday’s tacos and rosemary fresh for Thursday’s roast chicken.
Pro Tip: Create a “herb station” in your refrigerator. Dedicate one crisper drawer or shelf to your stored herbs, using different containers for each method. This organizational step makes it easy to see what you have, reduces the chance of forgetting about a bunch of parsley, and streamlines your cooking process.
By implementing these professional-grade storage solutions, you are making a conscious commitment to quality. You’re ensuring that the final, crucial garnish on a dish has the same aromatic punch as the herbs you used in the base. This attention to detail is what separates a good meal from an unforgettable dining experience. It’s an investment in consistency, a reduction in waste, and a powerful tool for delivering exceptional flavor every single time. Your clients, your family, and your palate will thank you.
Ready to experience the pinnacle of freshness without the prep work? The chefs at Culinary Collective Atl have mastered these techniques to ensure every meal we craft for our clients is bursting with vibrant, peak-season flavor. Let us handle the details, from sourcing the finest ingredients to perfect preservation, so you can simply enjoy an exceptional culinary experience.
Discover our private chef and meal prep services at Culinary Collective Atl.